
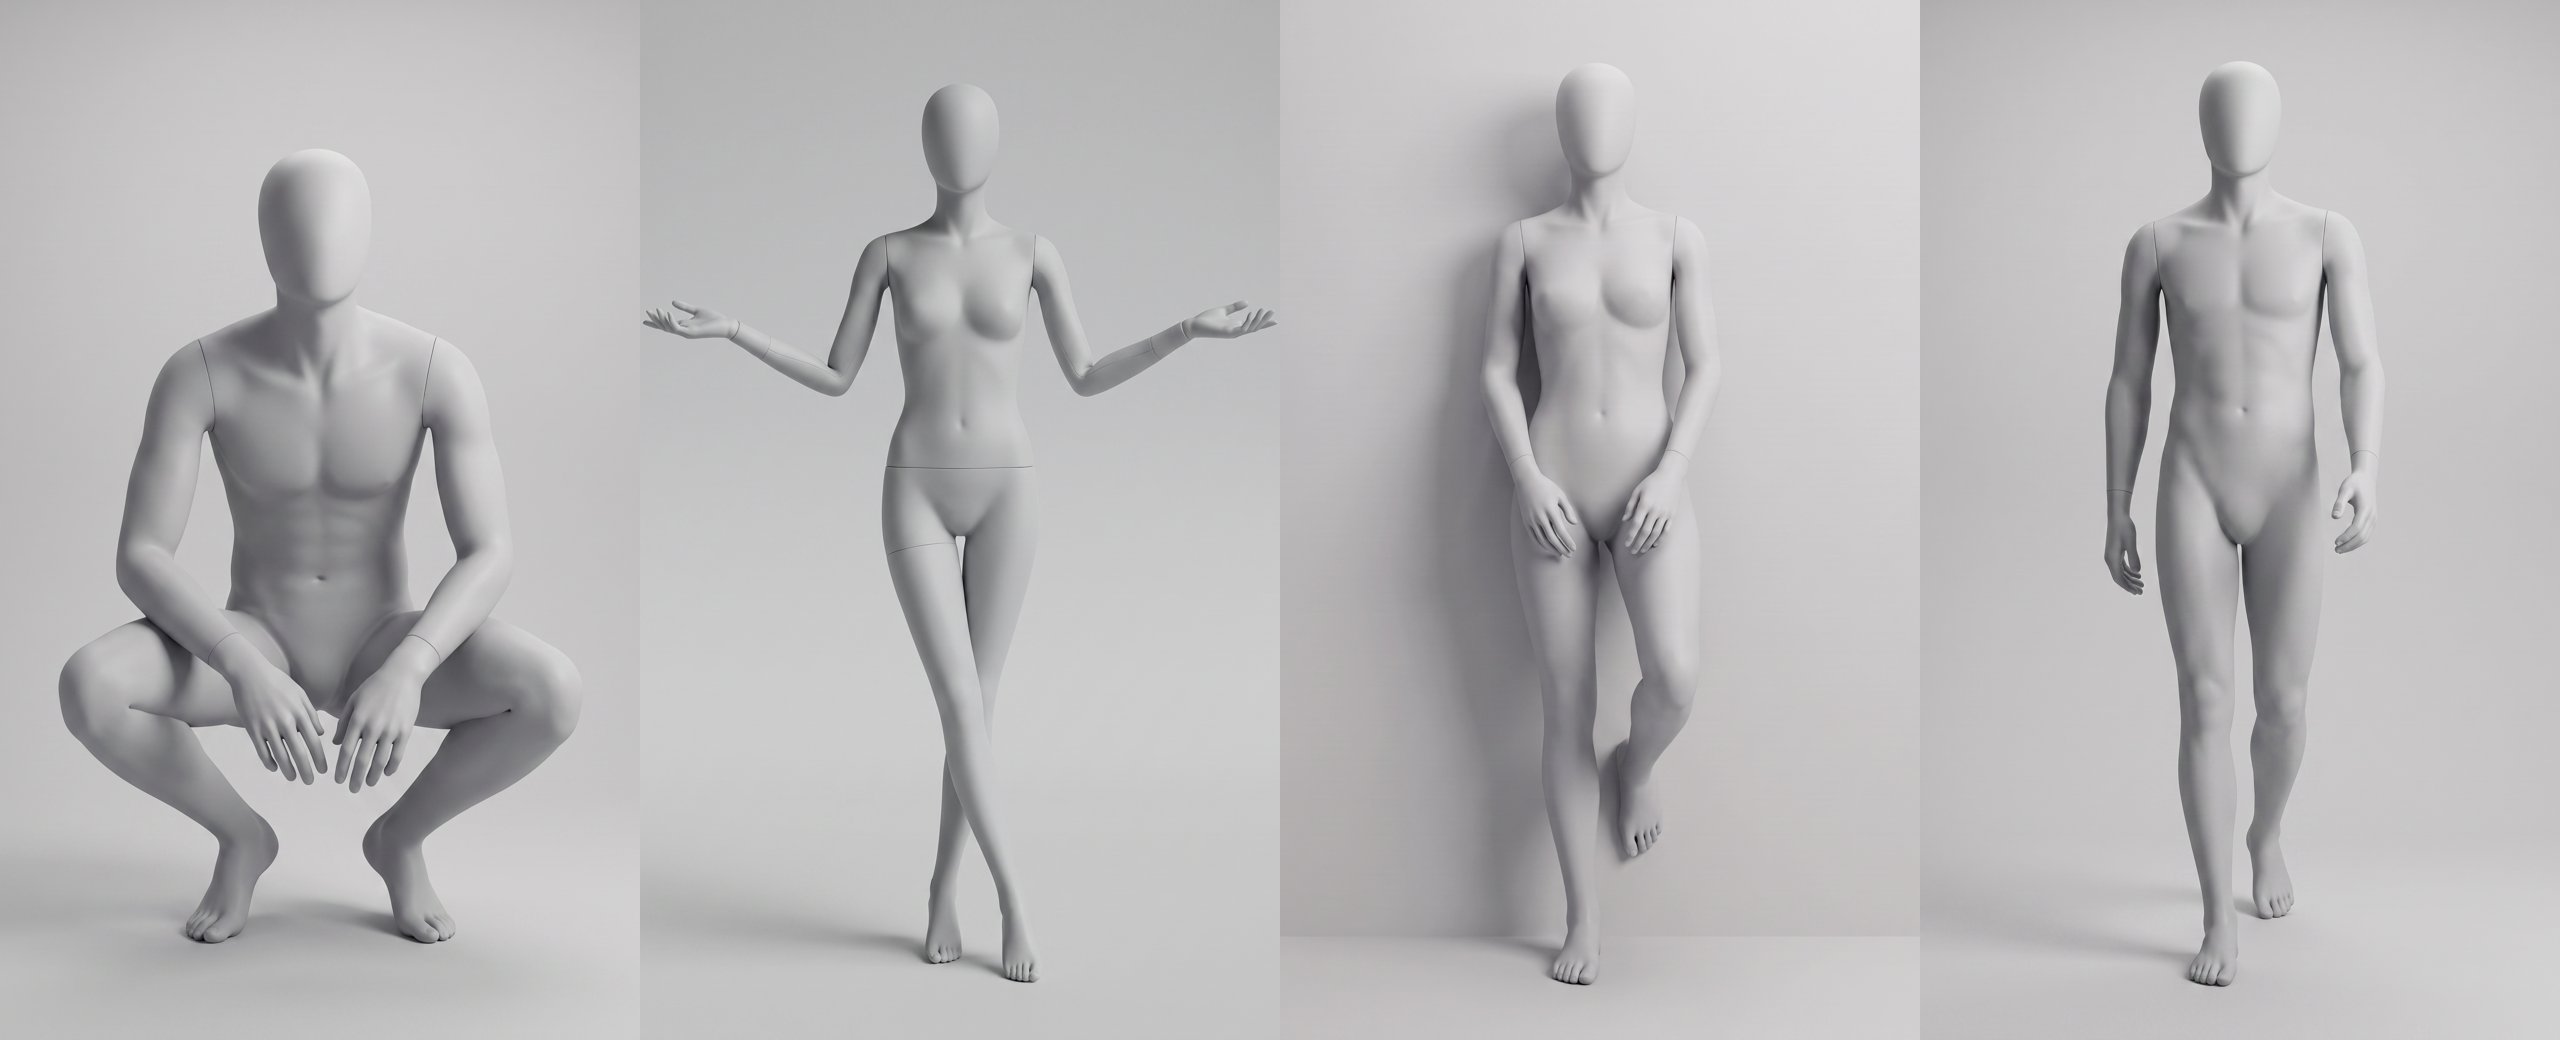
TL;DR: AI model pose prompts are short text descriptions that control exactly how a model stands in an AI-generated fashion image. This guide gives you a 12-pose copy-paste library built with a two-step workflow: generate one neutral grey mannequin in Create Image, then use Edit Image to move it into every pose you need — so the mannequin, lighting and set stay identical across the whole library, and every render works as a pose reference in The Fabricant’s Photo Studio.
An AI model pose prompt is a text instruction that tells an image model how a body should be positioned: where the weight sits, what the arms do, where the head points. Get the pose language right and you can art-direct a full e-commerce shoot from a keyboard. Get it vague and you get a different stance in every generation.
There is a second problem prompts alone cannot solve: consistency. Generate twelve poses as twelve separate text-to-image runs and you get twelve slightly different mannequins. The fix is the workflow in this guide: create one base mannequin, then generate every pose as an Edit Image variation of it. Each image below was made on app.thefabricant.com exactly that way, and each comes with its copy-paste prompt.
A pose reference is an image you hand to Photo Studio to say “stand exactly like this.” You could use a photo of a real model, but there is a catch: when a person appears in the pose reference, their identity can bleed into your generated model — face, skin tone, even hair can shift toward the reference. A featureless grey mannequin carries only the pose. Nothing else can leak.
Mannequin references have three more advantages: they are brand-safe (no model likeness rights attached), they are reusable across every product and every model you cast, and they make pose intent unambiguous for the AI — there is no clothing or lighting in the reference to confuse the generation.
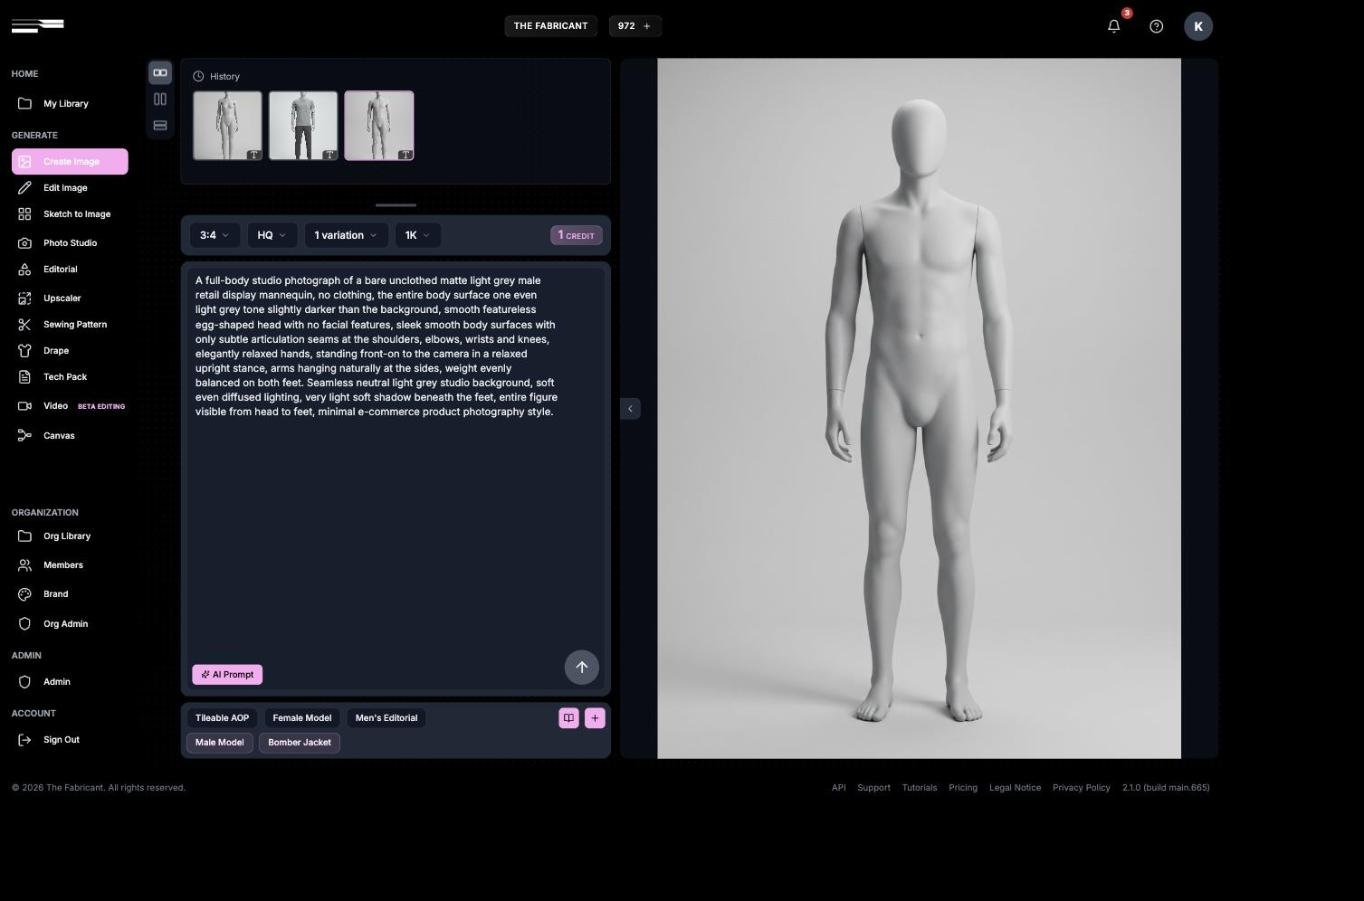
Everything starts with a single hero render in the Create Image tool. Settings: 3:4 ratio, High Quality, 1 variation — one credit. This is the exact prompt behind the mannequin used throughout this guide:
A full-body studio photograph of a bare unclothed matte light grey male retail display mannequin, no clothing, the entire body surface one even light grey tone slightly darker than the background, smooth featureless egg-shaped head with no facial features, sleek smooth body surfaces with only subtle articulation seams at the shoulders, elbows, wrists and knees, elegantly relaxed hands, standing front-on to the camera in a relaxed upright stance, arms hanging naturally at the sides, weight evenly balanced on both feet. Seamless neutral light grey studio background, soft even diffused lighting, very light soft shadow beneath the feet, entire figure visible from head to feet, minimal e-commerce product photography style.
Three details in the prompt do the heavy lifting: “bare unclothed … no clothing” stops the model dressing your mannequin, “smooth featureless egg-shaped head” keeps the head completely neutral, and “one even light grey tone slightly darker than the background” locks the material to the set.
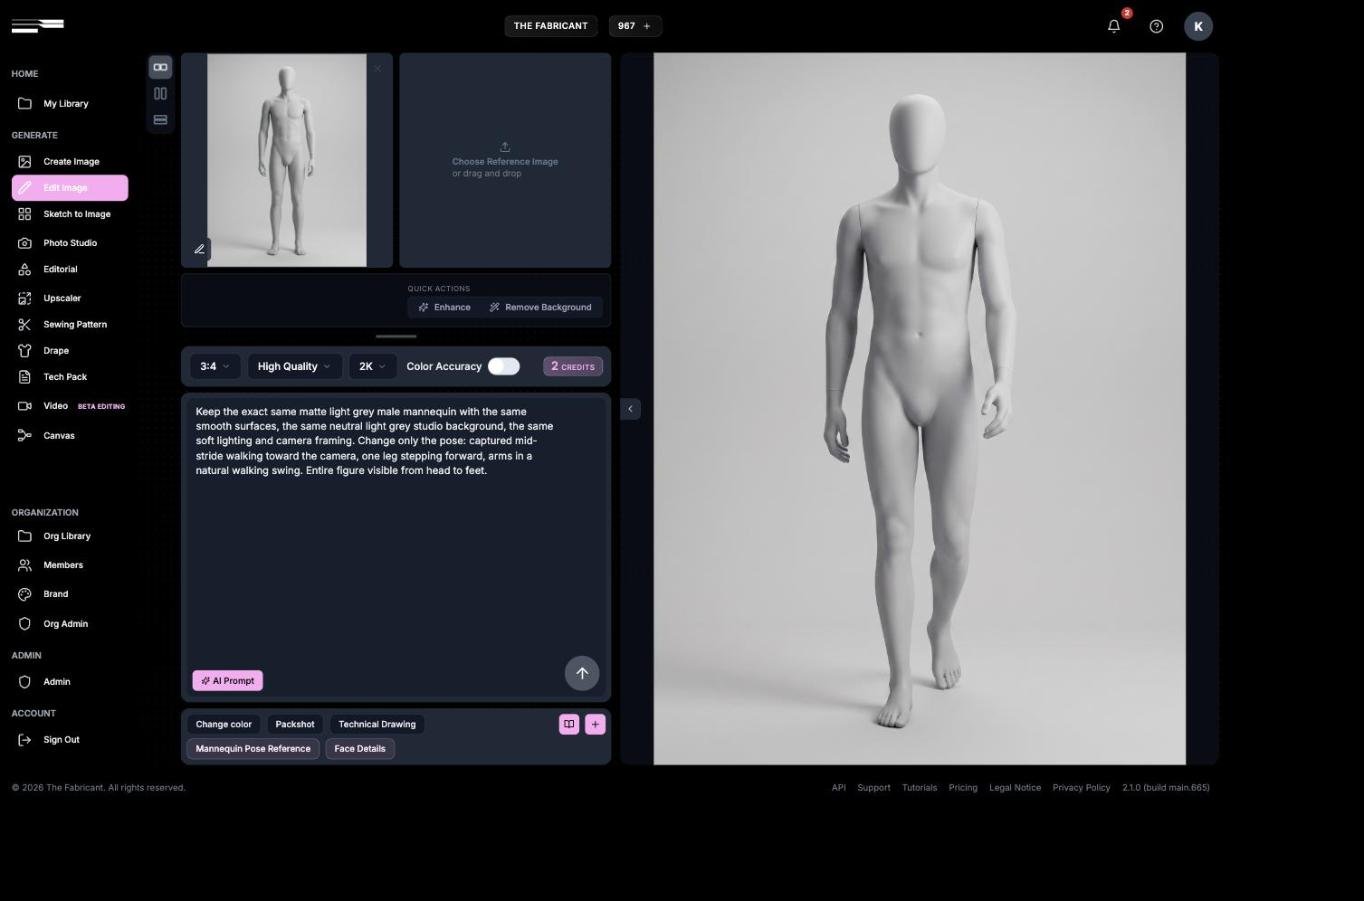
Now open the Edit Image tool, load the base render as the source image, and change only the pose. Because Edit Image works from your source, the mannequin’s material, the background and the lighting survive every generation — that is what keeps a 12-pose library looking like one photoshoot. The prompt pattern:
Keep the exact same matte light grey male mannequin with the same smooth surfaces, the same neutral light grey studio background, the same soft lighting and camera framing. Change only the pose: [NEW POSE DESCRIPTION]. Entire figure visible from head to feet.
Rather than rolling a new text-to-image generation (and a new, inconsistent mannequin), transform the base render itself. The female poses in this library all come from this one transform:
Transform this male mannequin into a female retail display mannequin with neutral female proportions, keeping the exact same matte light grey material, the same smooth featureless egg-shaped head with no facial features, the same subtle articulation seams, the same neutral light grey studio background, the same soft lighting, camera framing and very light soft shadow beneath the feet. Standing front-on in a relaxed upright stance, arms hanging naturally at the sides, weight evenly balanced. Entire figure visible from head to feet.
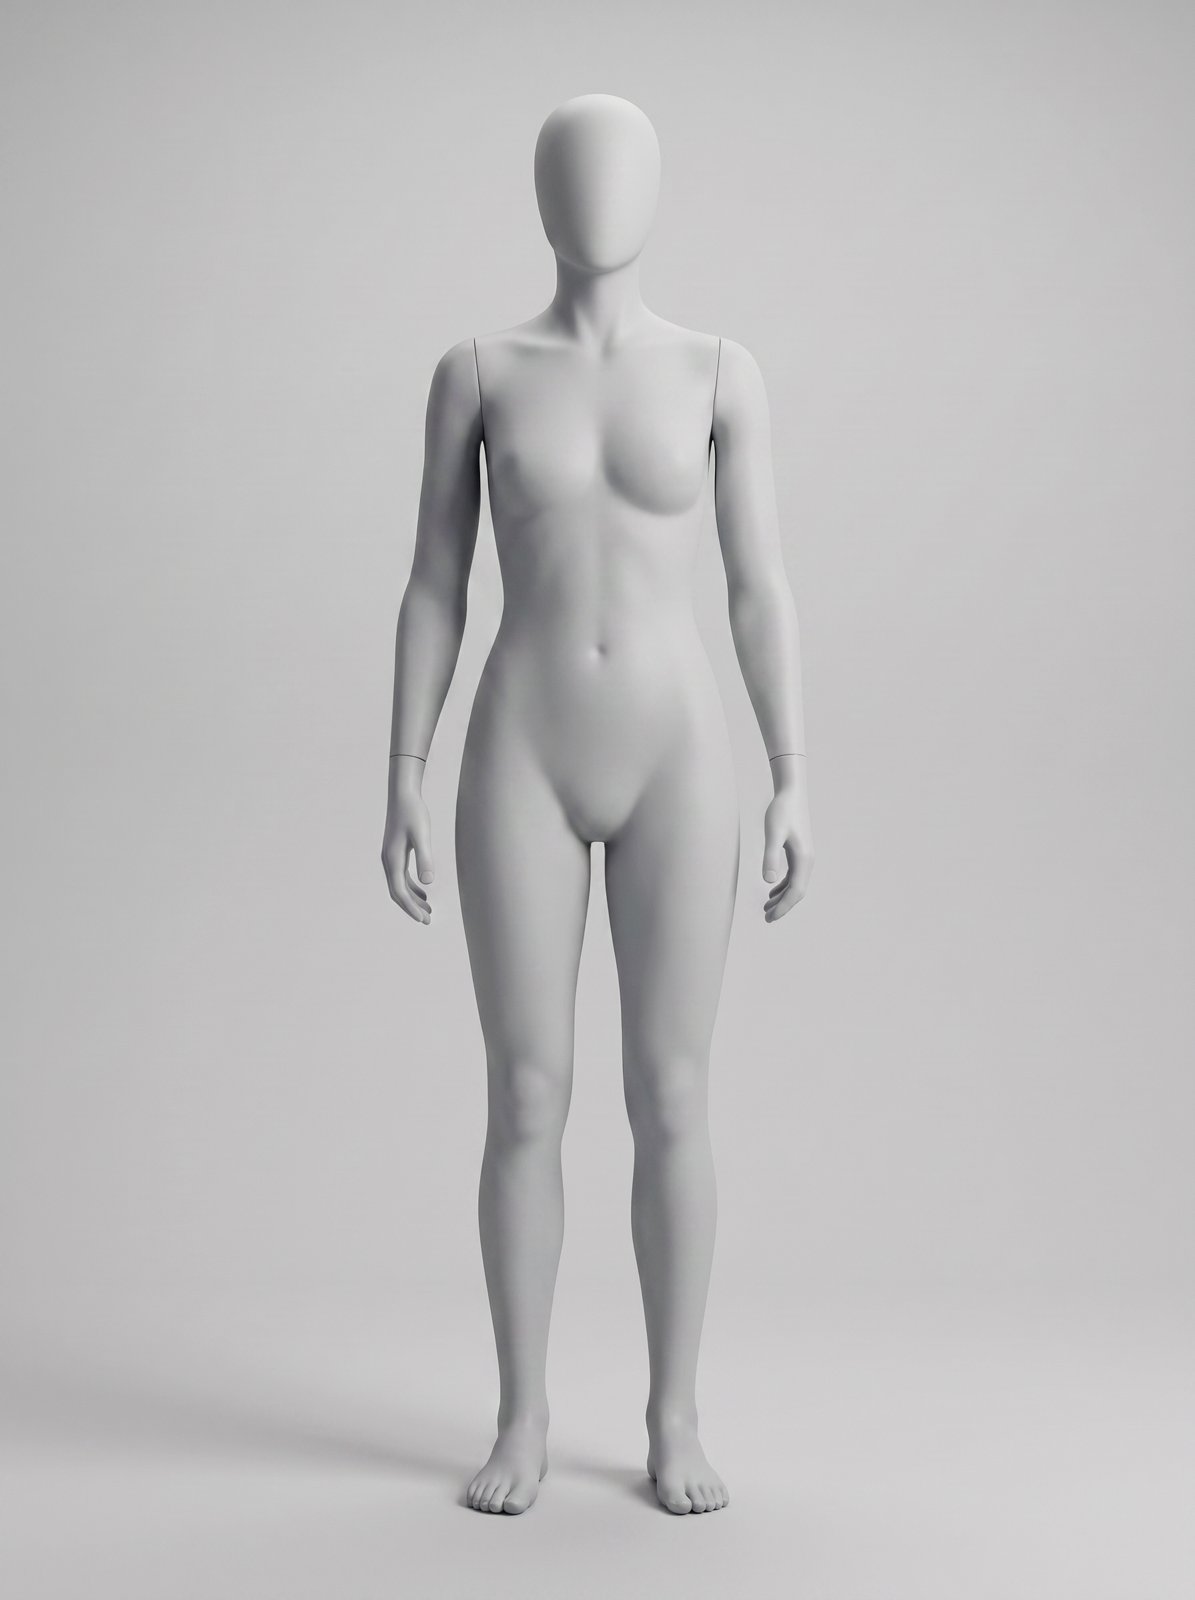
The four angles every product detail page needs — front, three-quarter, back and profile — each with enough attitude to feel shot, not staged. Because every one is an Edit Image variation of the same base mannequin, they cut together like a single studio session.
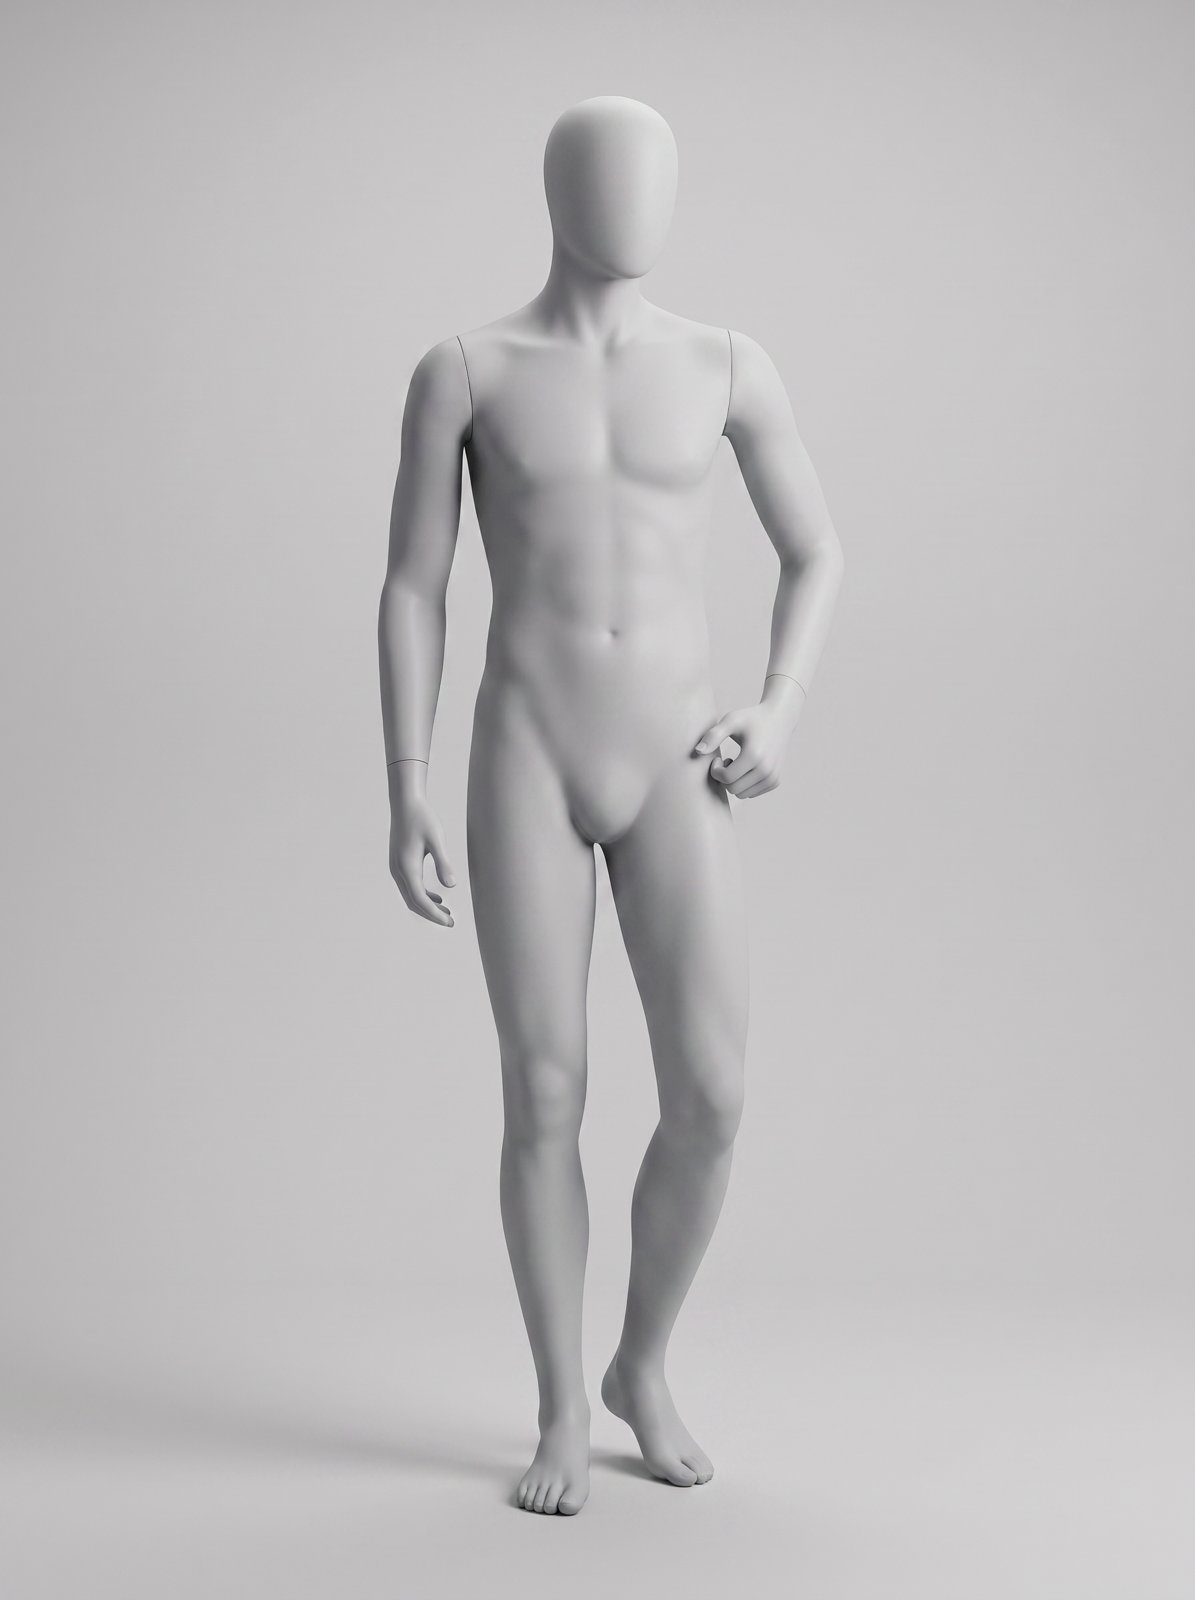
Keep the exact same matte light grey male mannequin with the same smooth surfaces, the same neutral light grey studio background, the same soft lighting and camera framing. Change only the pose: standing front-on with weight shifted onto one leg in a relaxed contrapposto, the opposite knee softened, one thumb hooked at the hip, the other arm relaxed, chin angled slightly. Entire figure visible from head to feet.
Use it for: The hero shot with a pulse: the weight shift and hooked thumb make basics look styled.
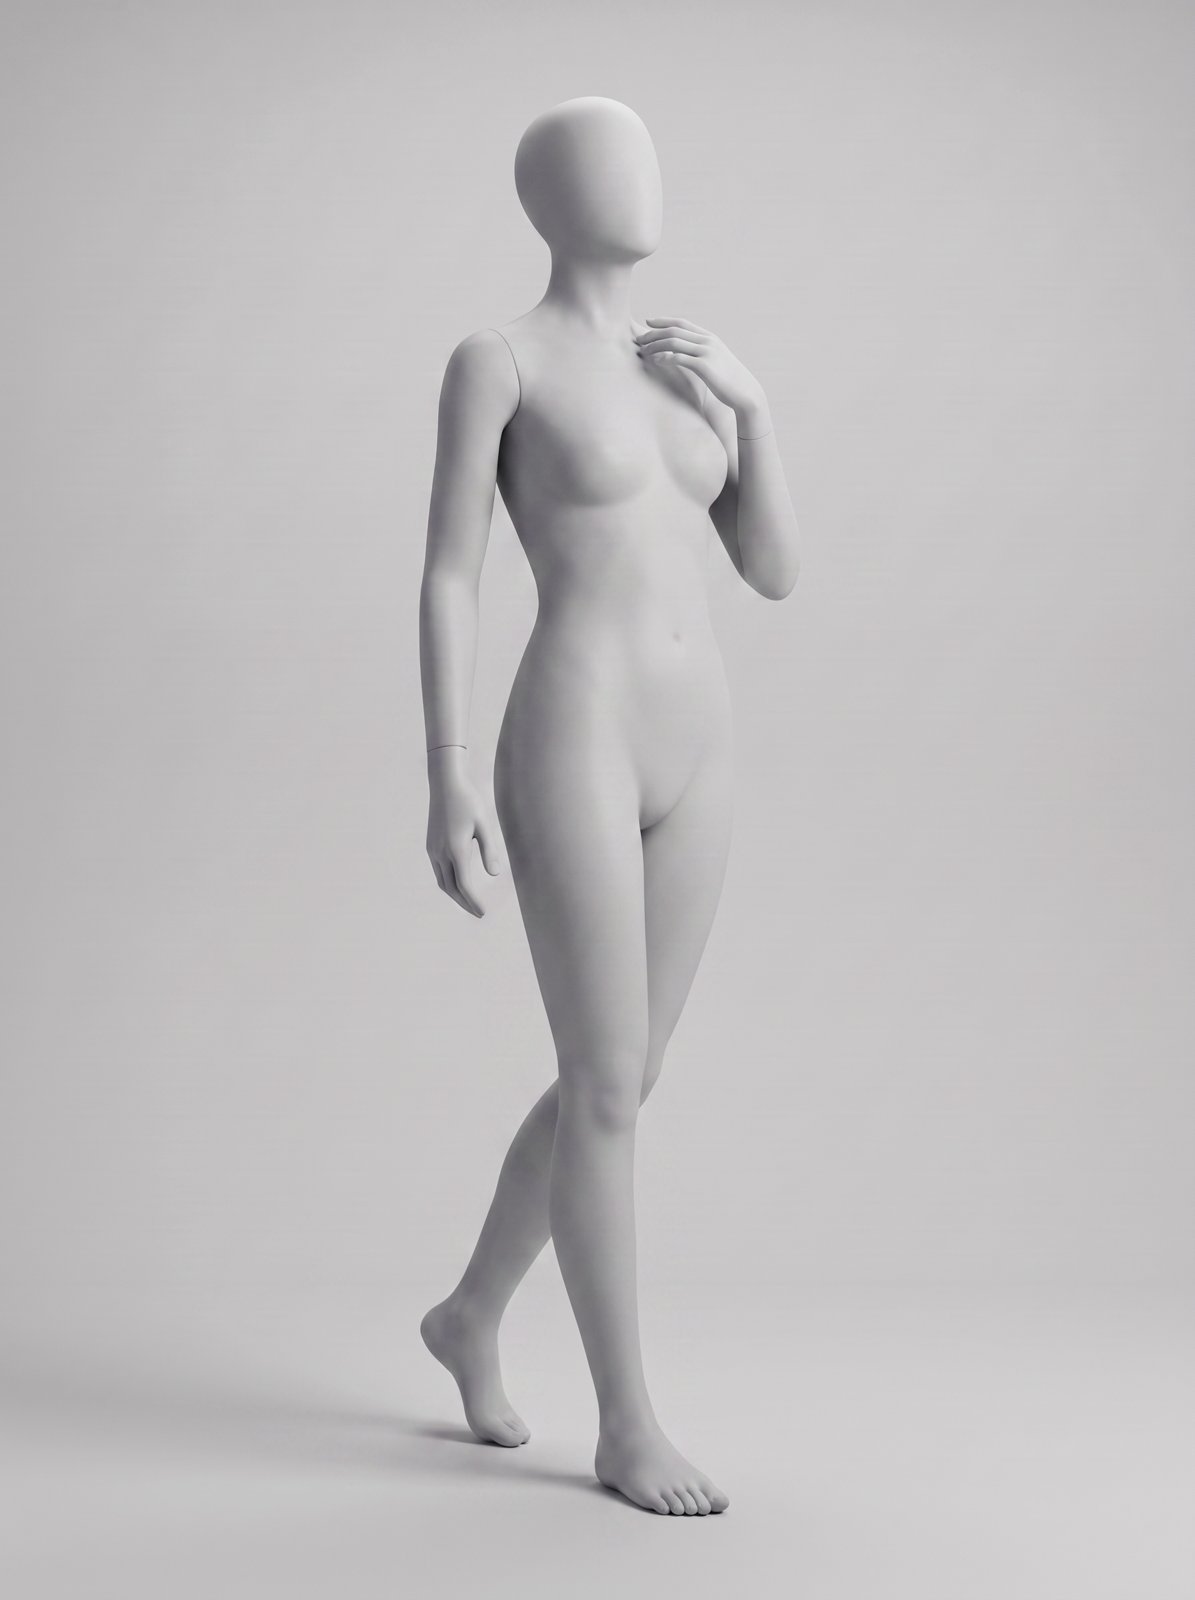
Keep the exact same matte light grey female mannequin with the same smooth surfaces, the same neutral light grey studio background, the same soft lighting and camera framing. Change only the pose: three-quarter stance with weight on the back leg, front leg extended with the toe pointed, one hand raised lightly to the collarbone, chin lifted. Entire figure visible from head to feet.
Use it for: Drape and silhouette in one frame with an editorial line through the body; made for dresses and outerwear.
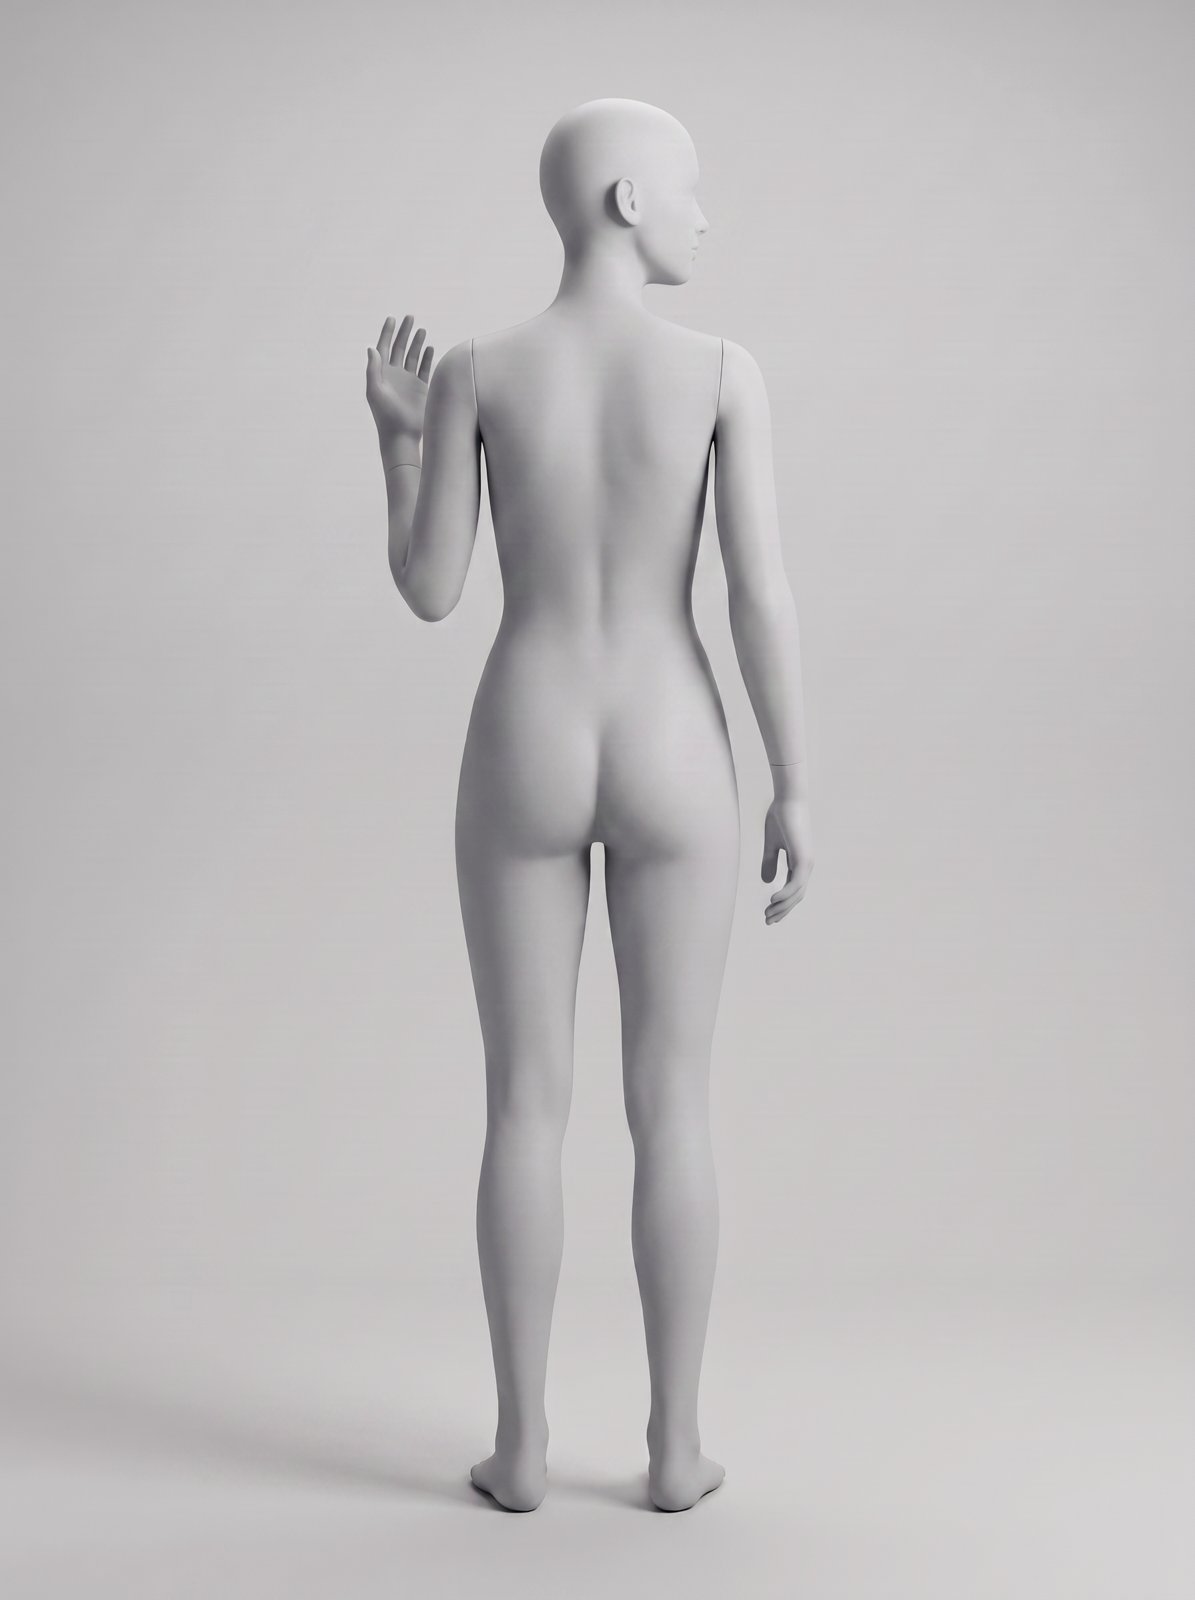
Keep the exact same matte light grey female mannequin with the same smooth surfaces, the same neutral light grey studio background, the same soft lighting and camera framing. Change only the pose: standing with the back to the camera, weight settled on one hip, head turned to a side profile, one arm bent with the hand raised near the shoulder, the other arm relaxed. Entire figure visible from head to feet.
Use it for: Back details with life in them: the hip shift and turned head keep prints, straps and seams from feeling like a lineup shot.
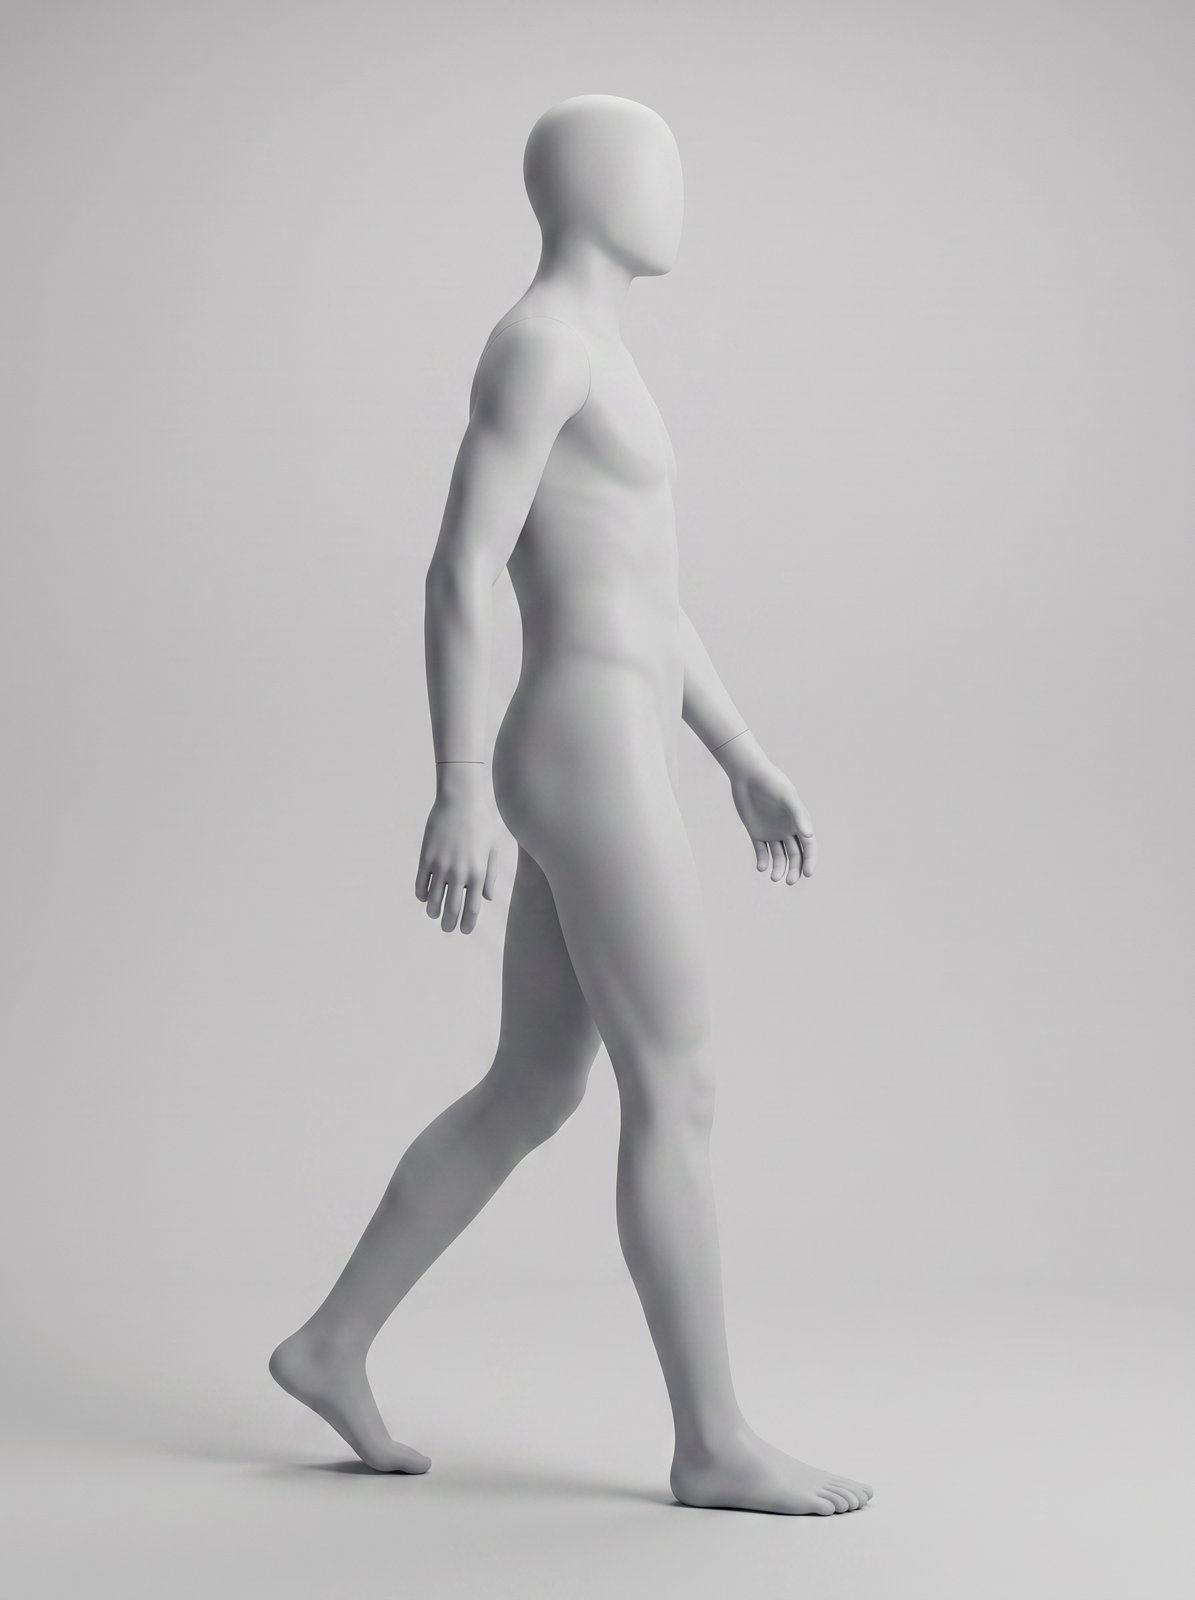
Keep the exact same matte light grey male mannequin with the same smooth surfaces, the same neutral light grey studio background, the same soft lighting and camera framing. Change only the pose: full side profile caught mid-stride, back heel lifted off the floor, arms in a gentle walking swing, head level facing the direction of travel. Entire figure visible from head to feet.
Use it for: The fit shot in motion: trouser break, jacket length and layering depth, read through a walking body line.
Static poses sell the product; movement poses sell the feeling. These read as candid while staying controlled enough for a product grid.
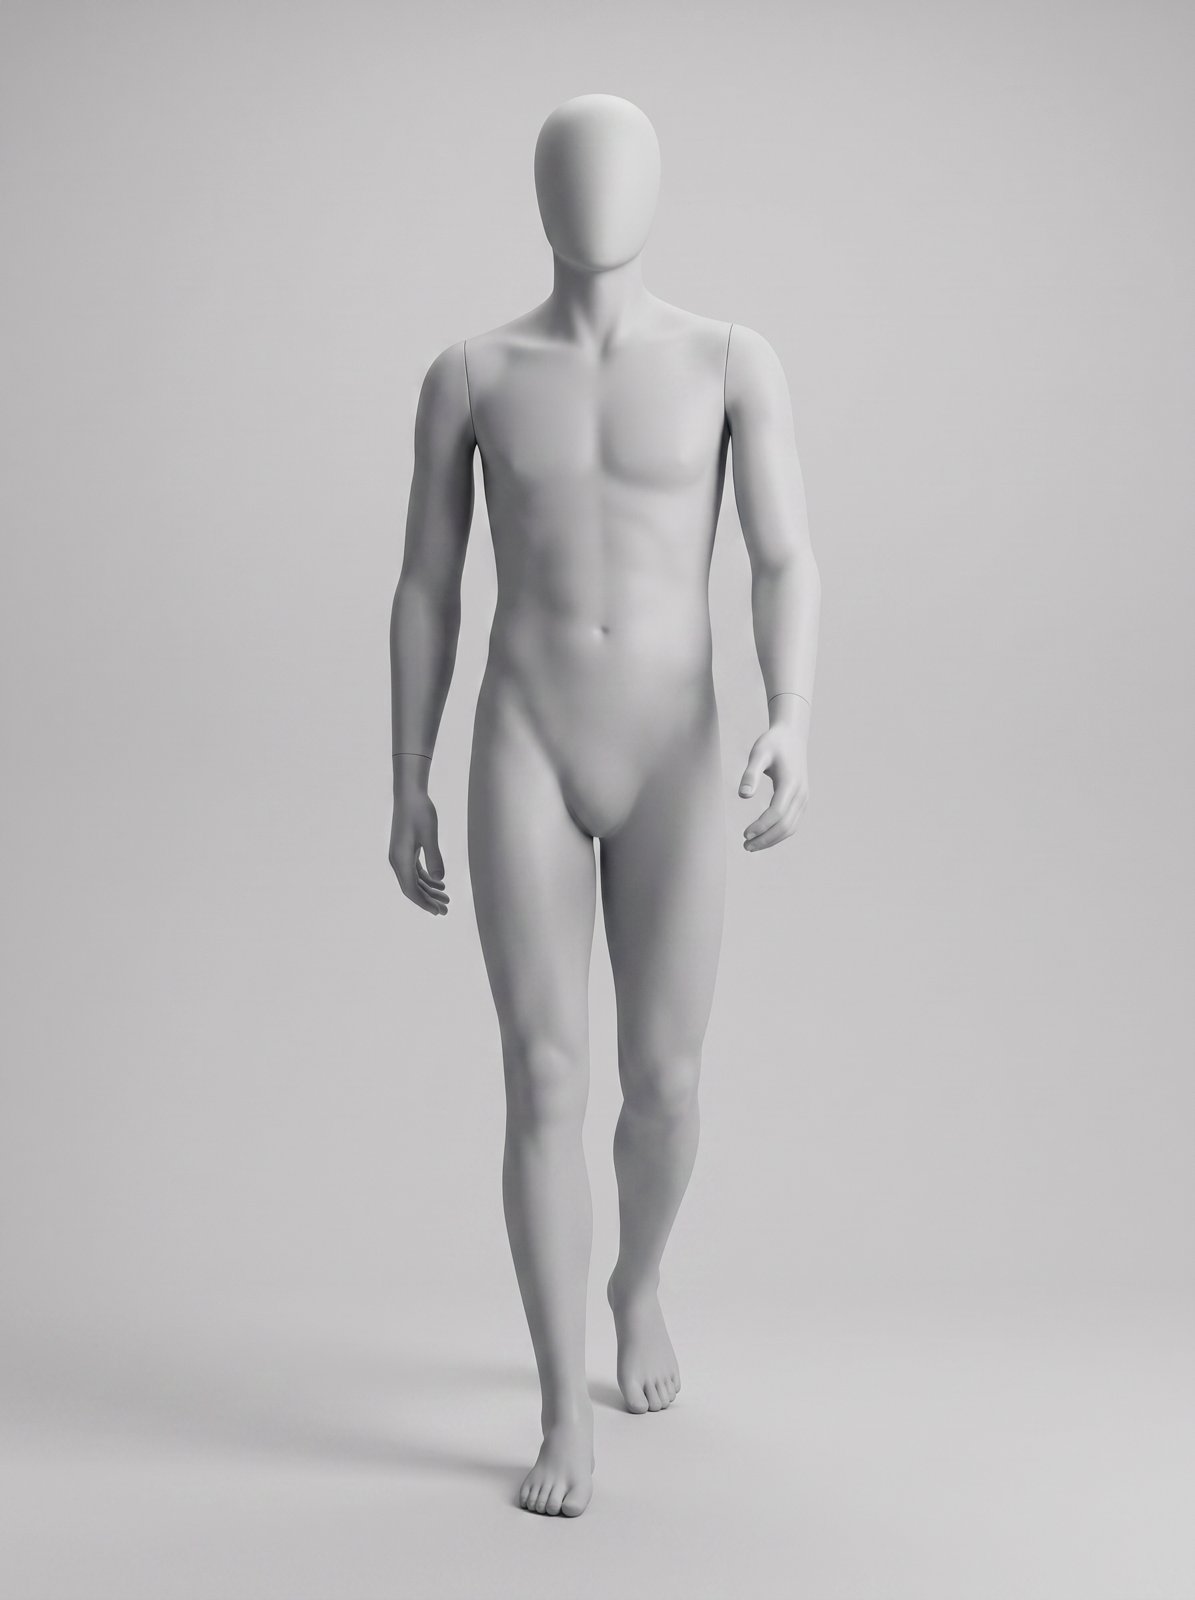
Keep the exact same matte light grey male mannequin with the same smooth surfaces, the same neutral light grey studio background, the same soft lighting and camera framing. Change only the pose: confident runway stride toward the camera with a long step, arms in a full natural swing, slight rotation in the torso, head held high. Entire figure visible from head to feet.
Use it for: The catwalk frame: long step, full swing, torso rotation — trousers and coats move like they should.
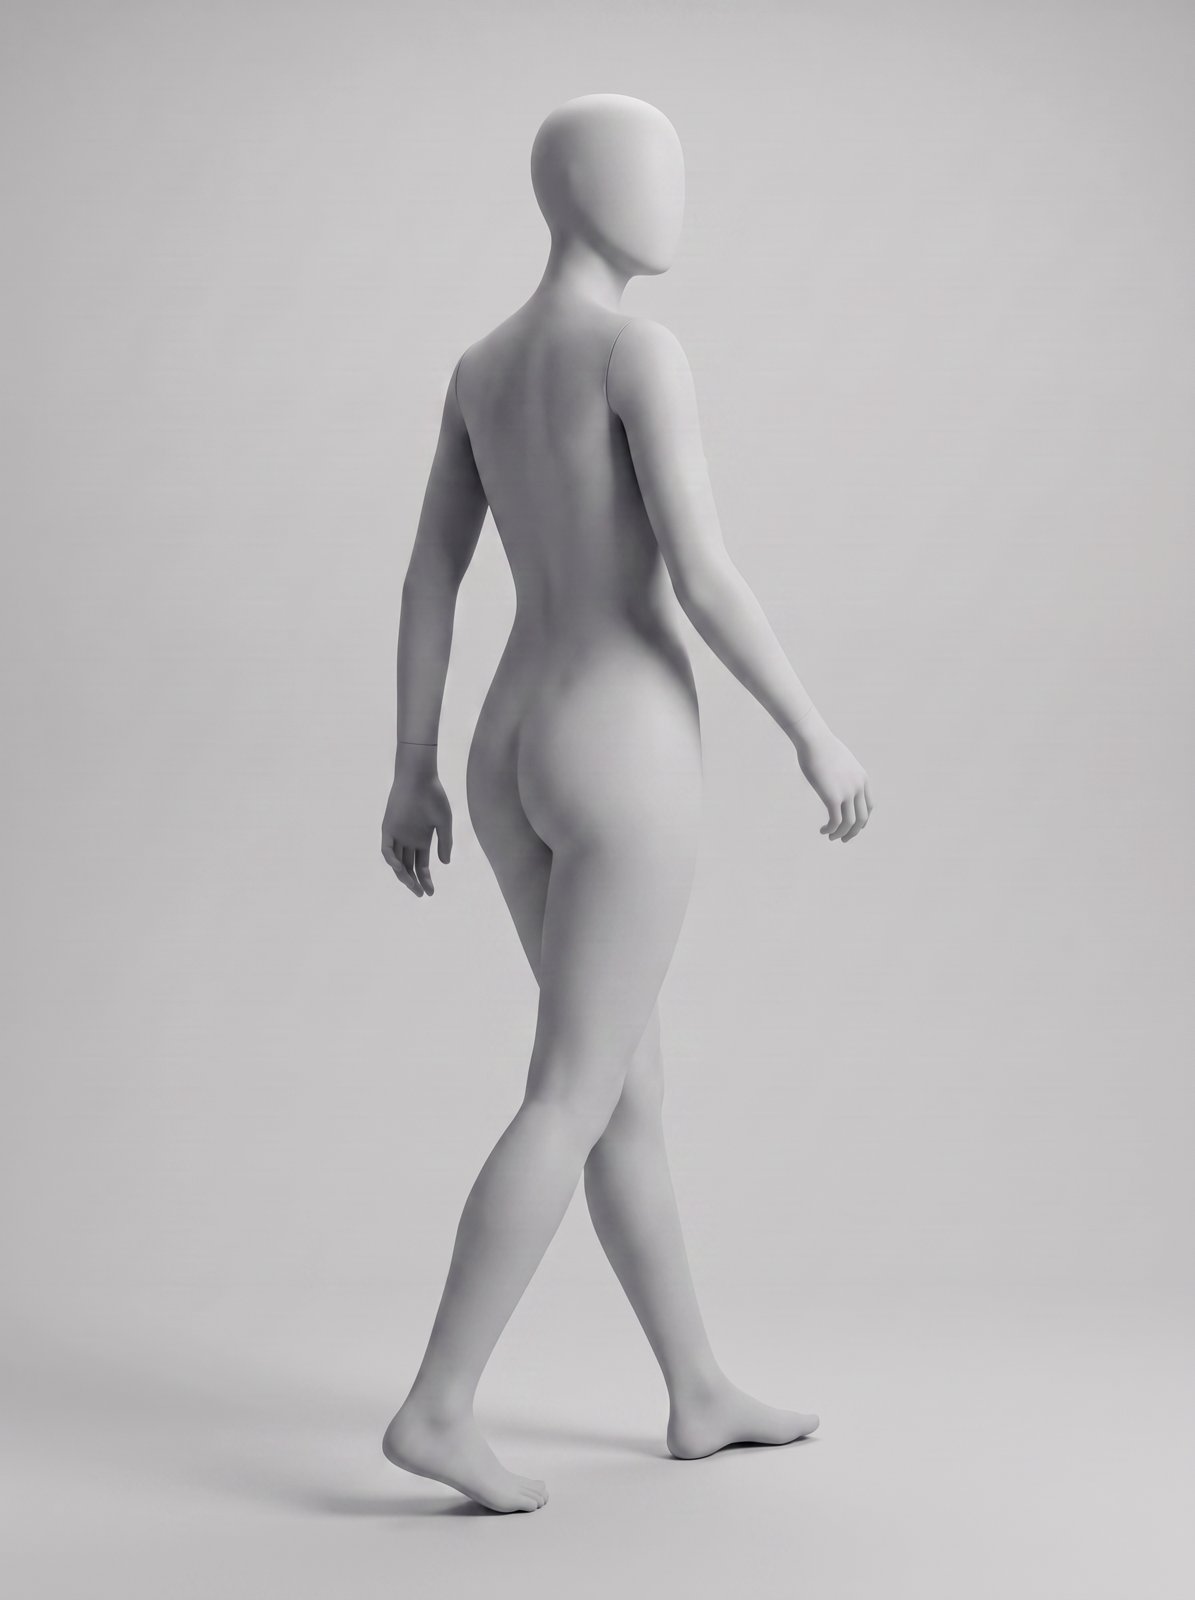
Keep the exact same matte light grey female mannequin with the same smooth surfaces, the same neutral light grey studio background, the same soft lighting and camera framing. Change only the pose: walking away from the camera mid-step while turning the head back over the shoulder toward the camera, rear arm caught mid-swing. Entire figure visible from head to feet.
Use it for: The exit shot: back of the garment in motion with the glance keeping a connection to camera.
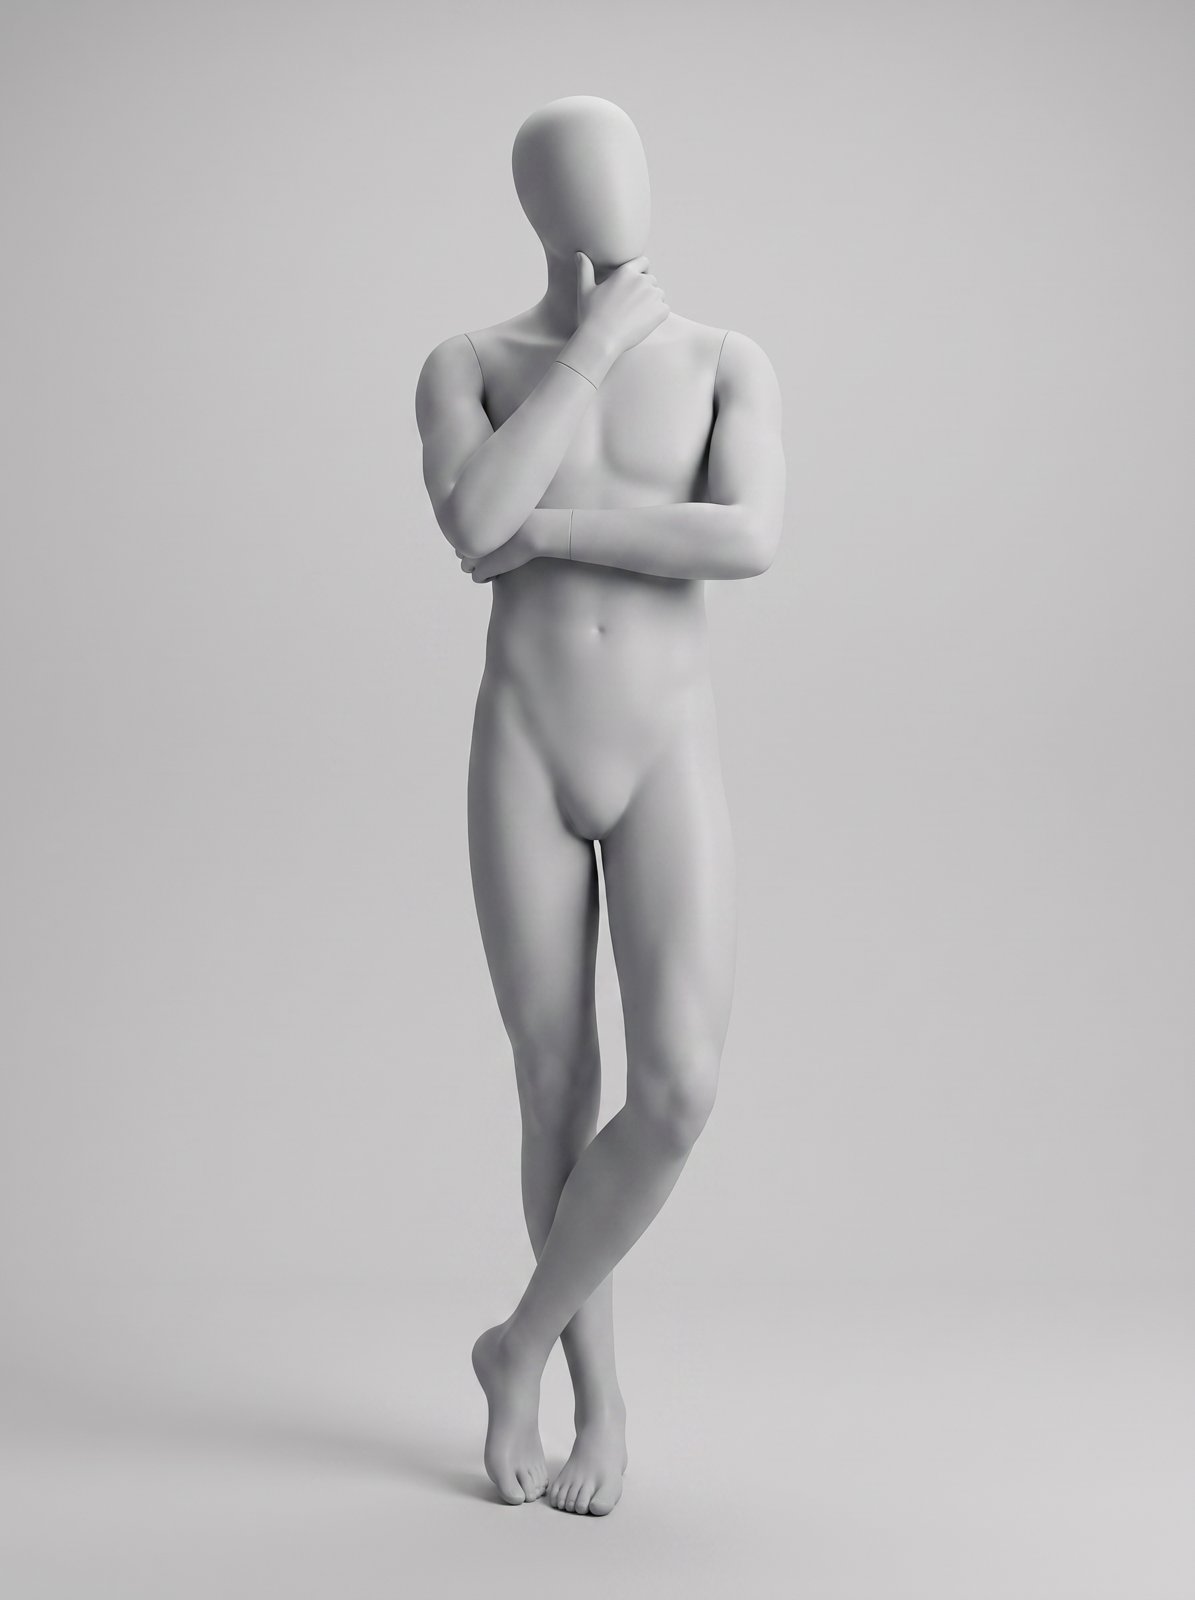
Keep the exact same matte light grey male mannequin with the same smooth surfaces, the same neutral light grey studio background, the same soft lighting and camera framing. Change only the pose: arms crossed over the chest with one hand raised so the thumb rests under the chin, head tilted slightly in thought, one ankle crossed over the other. Entire figure visible from head to feet.
Use it for: The thinker with attitude; the crossed ankle and raised hand turn a static staple into a portrait pose.
For campaign imagery and lifestyle content, these poses bring attitude without losing garment visibility.
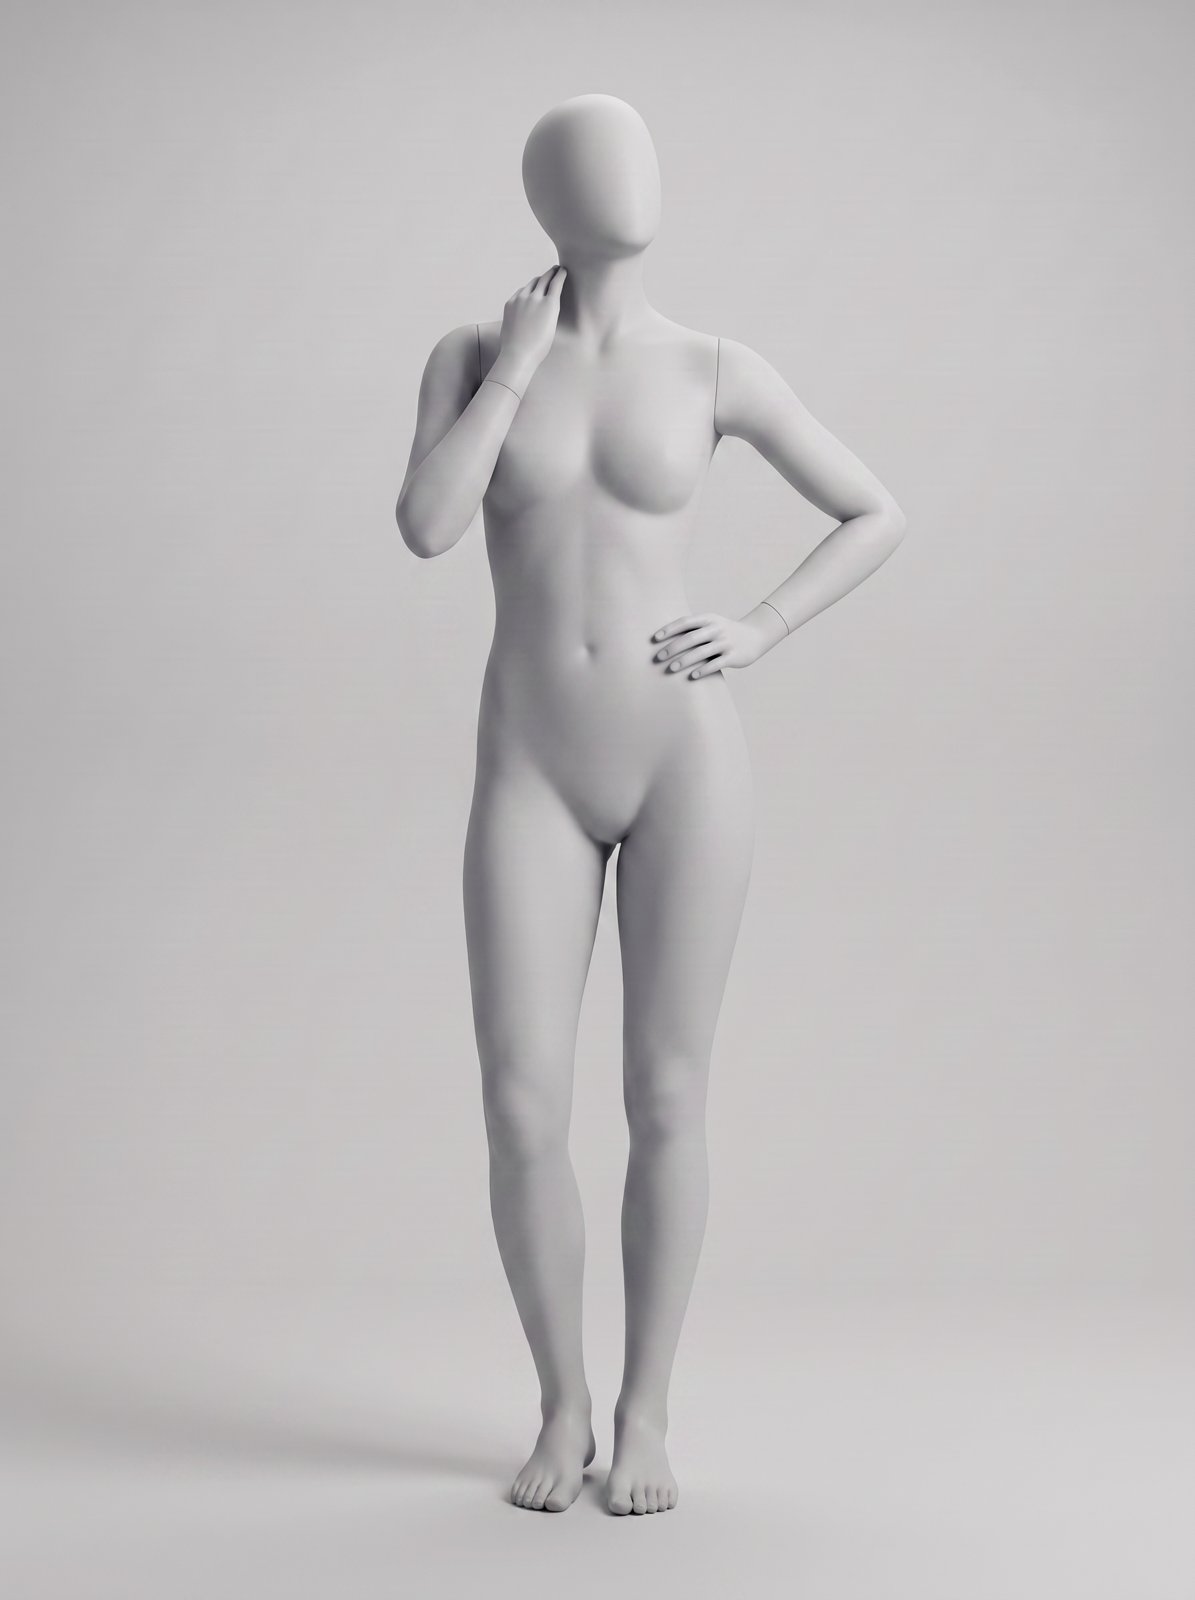
Keep the exact same matte light grey female mannequin with the same smooth surfaces, the same neutral light grey studio background, the same soft lighting and camera framing. Change only the pose: one hand on the hip with the elbow out, the other hand raised lightly touching the side of the neck, hip shifted to the side, chin lifted, one knee softly bent. Entire figure visible from head to feet.
Use it for: The campaign power pose: the second gesture and hip shift give blazers and structured pieces real presence.
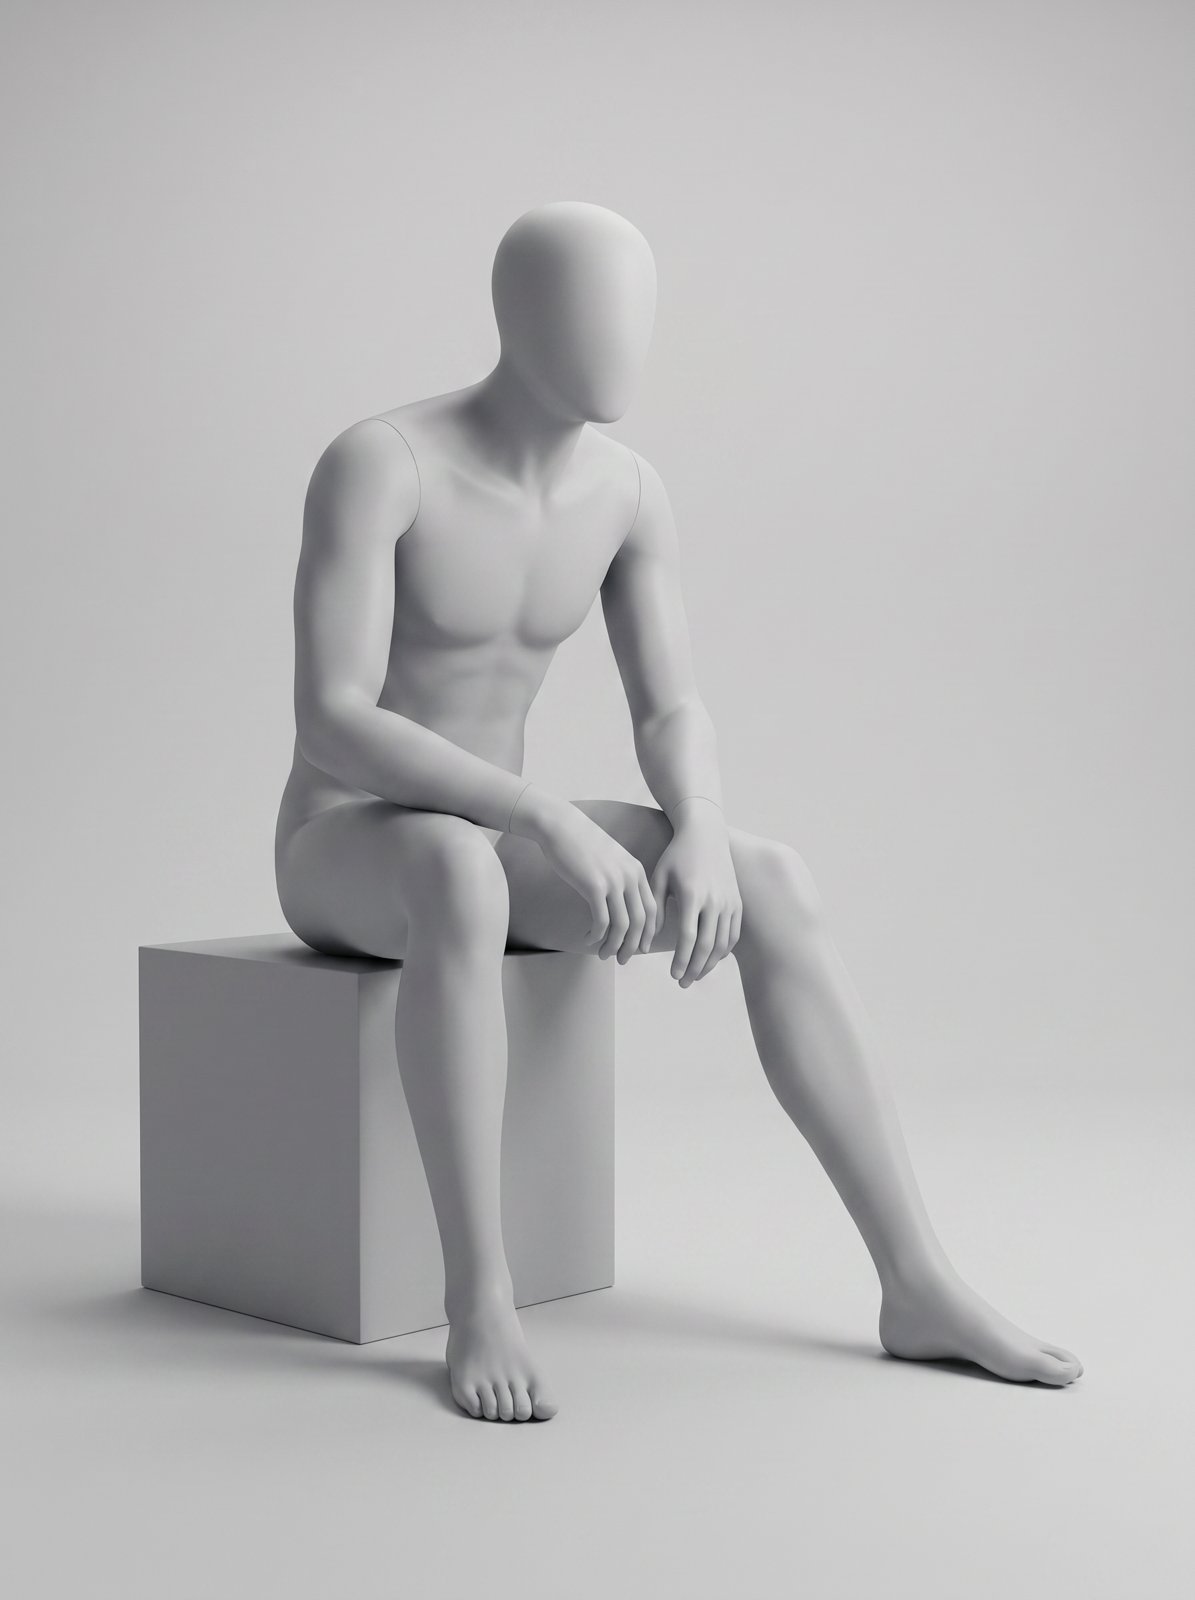
Keep the exact same matte light grey male mannequin with the same smooth surfaces, the same neutral light grey studio background, the same soft lighting and camera framing. Change only the pose: seated on a low light grey display cube, leaning forward with forearms resting on the knees, one leg extended further out, head turned to a three-quarter angle, very light soft shadow beneath the cube. Entire figure visible from head to feet.
Use it for: Grounded and editorial; the forward lean and extended leg bring denim and footwear into the story.
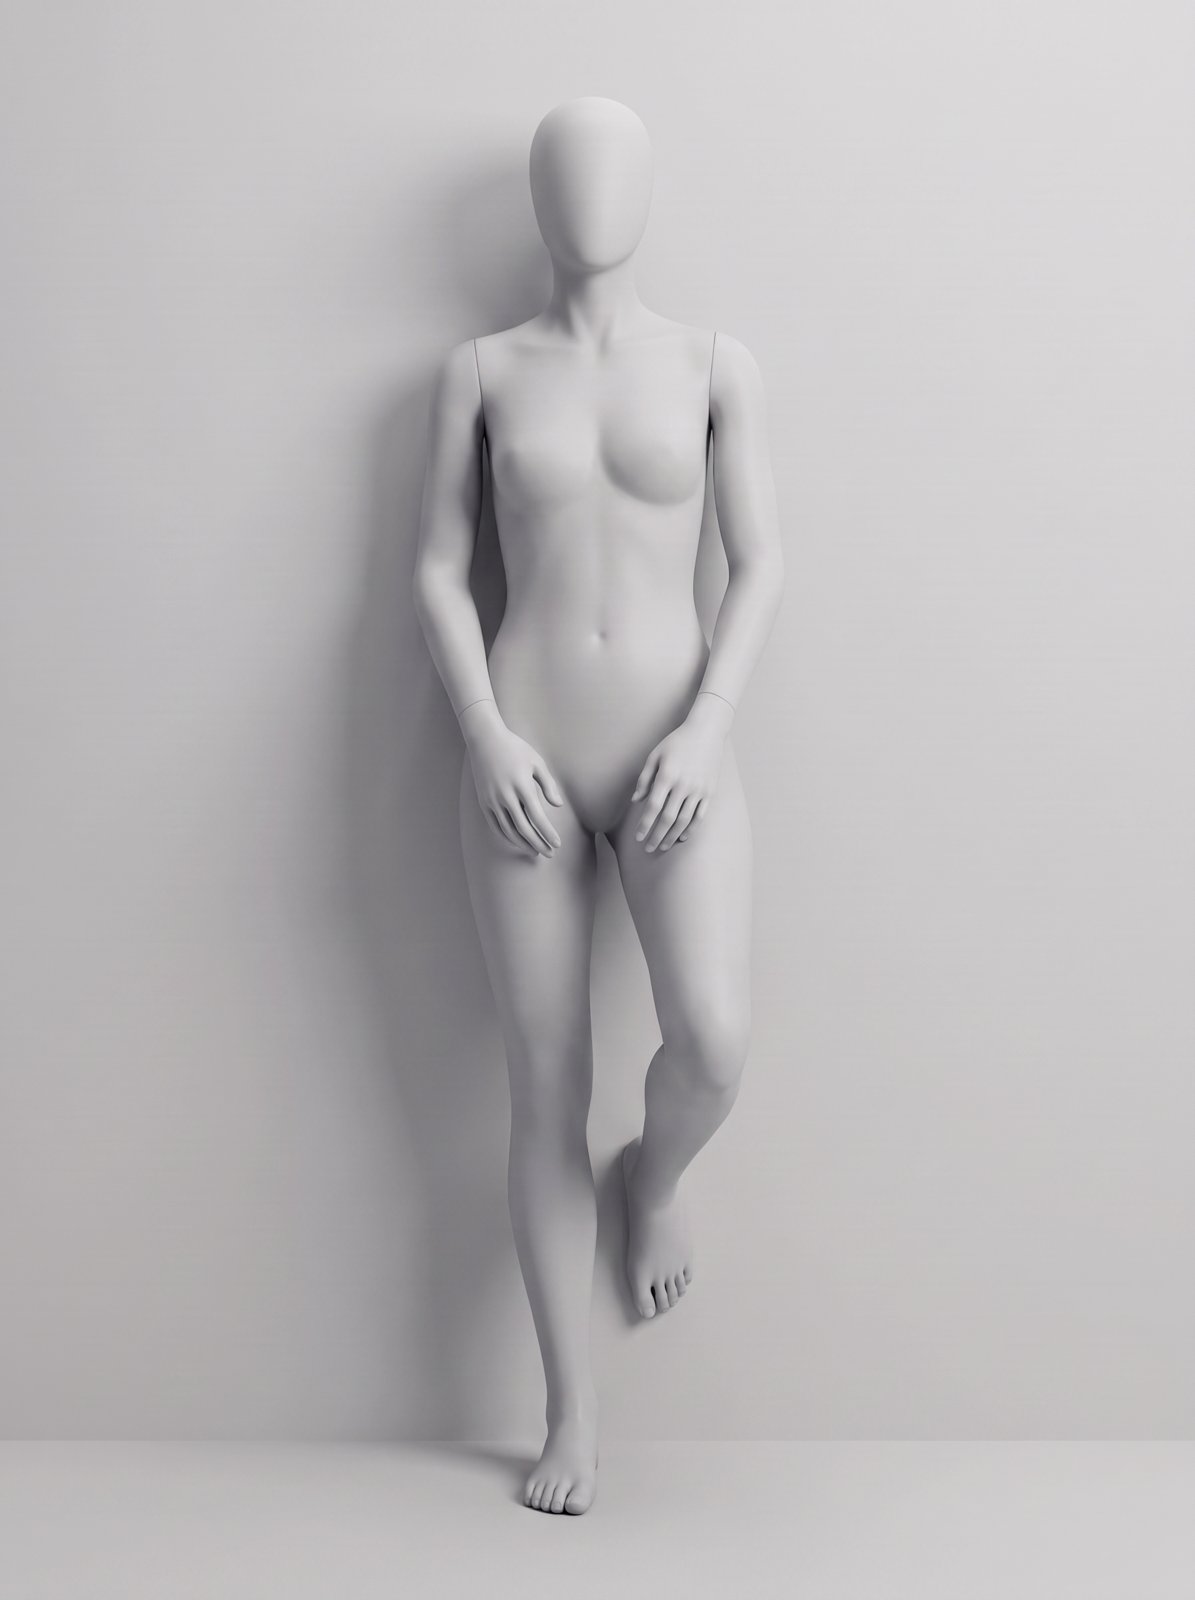
Keep the exact same matte light grey female mannequin with the same smooth surfaces, the same neutral light grey studio background, the same soft lighting and camera framing. Change only the pose: leaning back against a plain light grey studio wall, one foot flat against the wall with the knee bent, arms relaxed and loosely crossed low in front. Entire figure visible from head to feet.
Use it for: The classic street-cast frame; the raised foot makes trousers, skirts and sneakers read instantly.
The library so far is studio-clean; these six poses bring street-style energy. Each was made by feeding a street photography shot into Edit Image and converting the pose straight into a mannequin (the workflow is explained below the poses) — but you can also recreate any of them from your base render with the prompts given here.
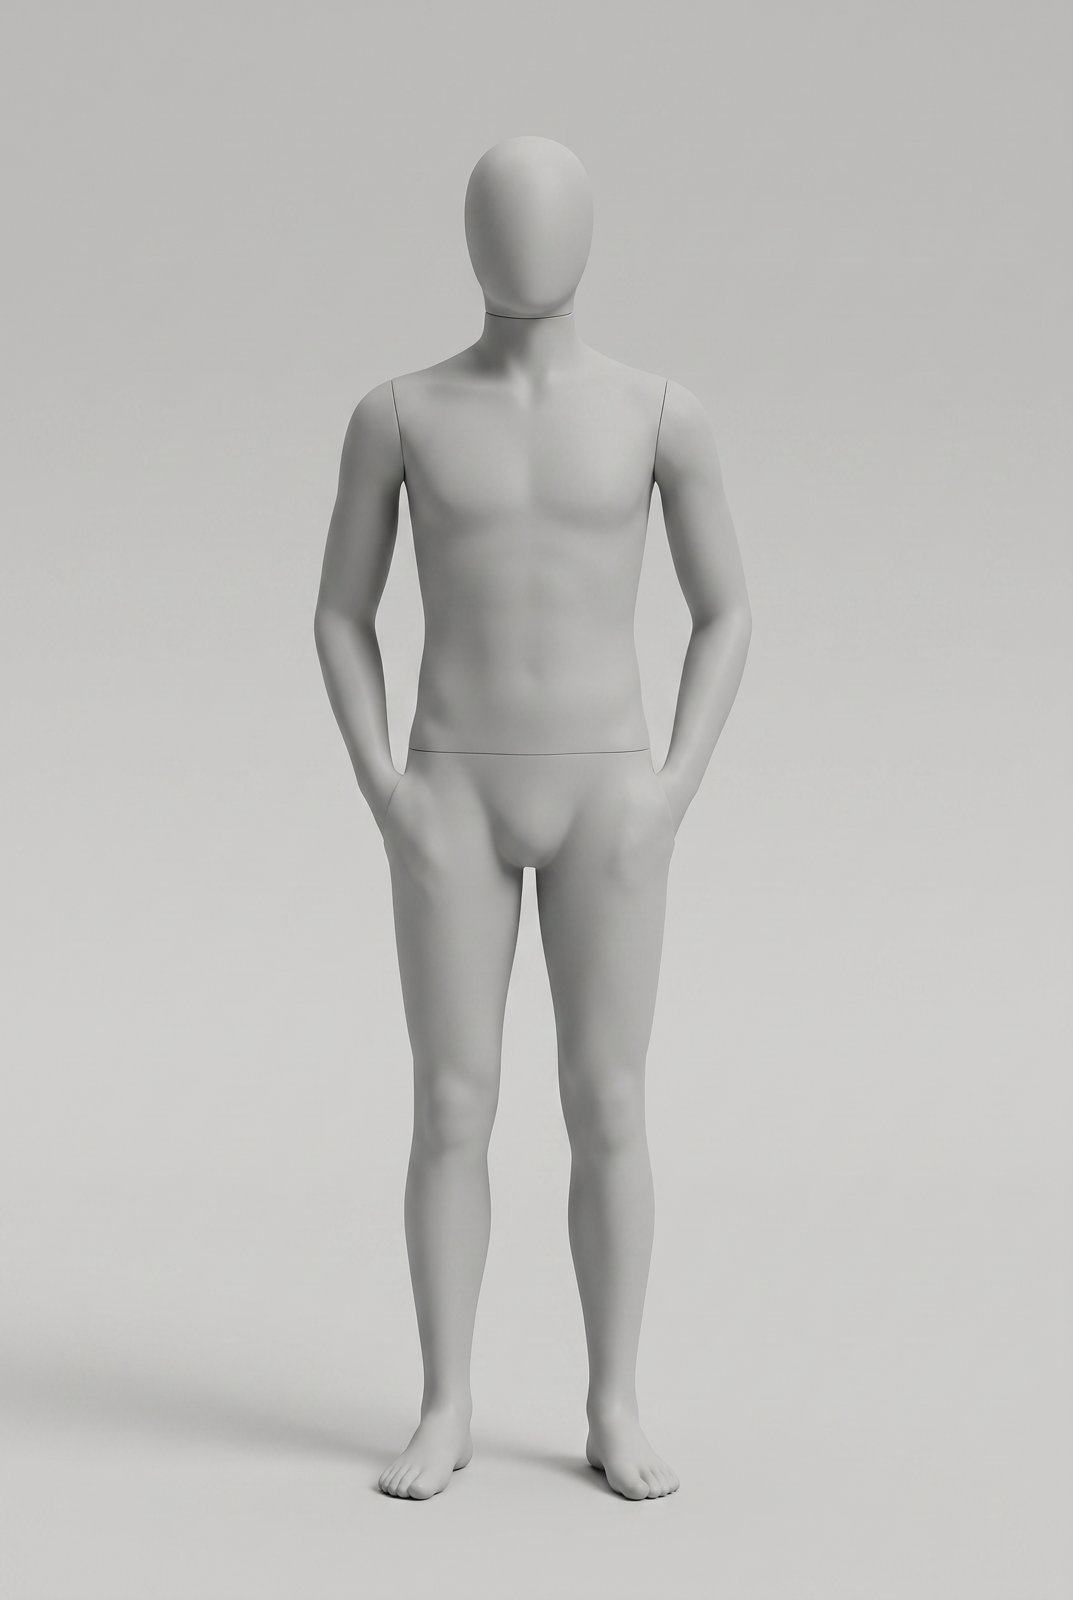
Keep the exact same matte light grey male mannequin with the same smooth surfaces, the same neutral light grey studio background, the same soft lighting and camera framing. Change only the pose: standing front-on in a relaxed street stance, hands tucked at the hips as if resting in pockets, shoulders relaxed, weight settled evenly. Entire figure visible from head to feet.
Use it for: The definitive off-duty stance; makes outerwear and denim read effortless.
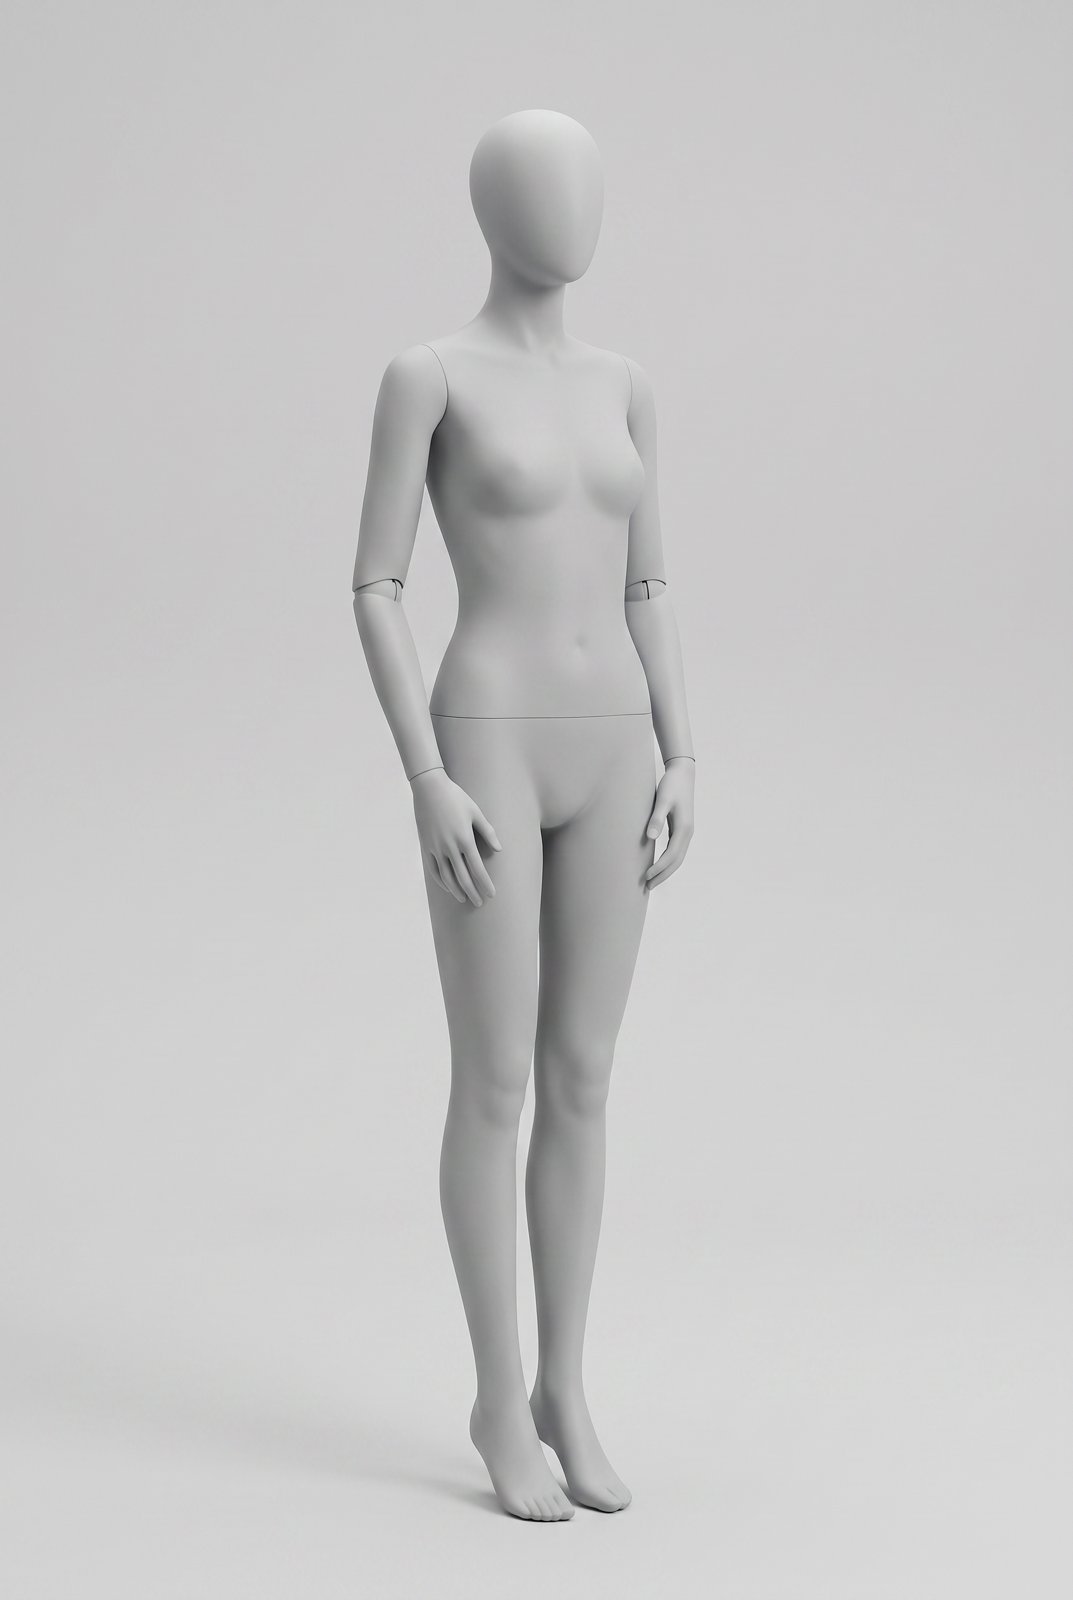
Keep the exact same matte light grey female mannequin with the same smooth surfaces, the same neutral light grey studio background, the same soft lighting and camera framing. Change only the pose: standing at a slight angle with both hands gently held together in front of the hips, feet close together, head level and calm. Entire figure visible from head to feet.
Use it for: Quiet and poised; suits dresses, tailoring and campaign portraits with a soft register.
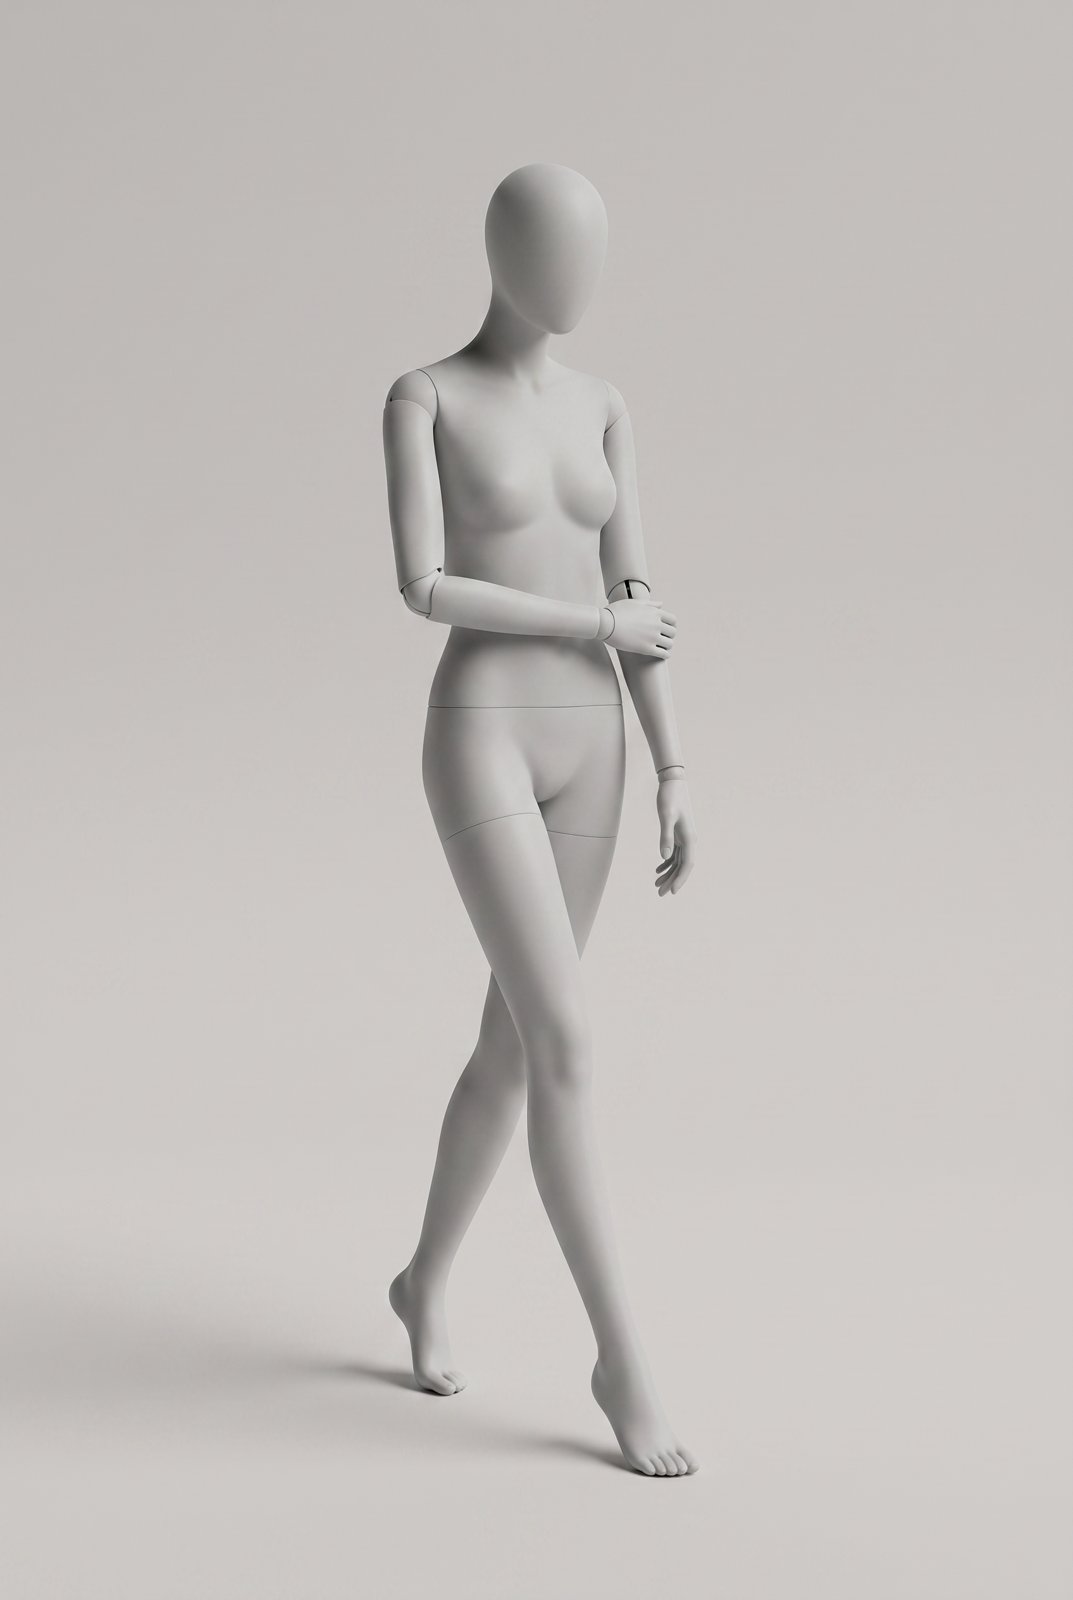
Keep the exact same matte light grey female mannequin with the same smooth surfaces, the same neutral light grey studio background, the same soft lighting and camera framing. Change only the pose: walking mid-step with the head tilted gently down, one forearm folded across the front of the waist, the other arm relaxed at the side. Entire figure visible from head to feet.
Use it for: The candid caught-in-motion frame; the folded arm adds an editorial beat to any coat or knit.
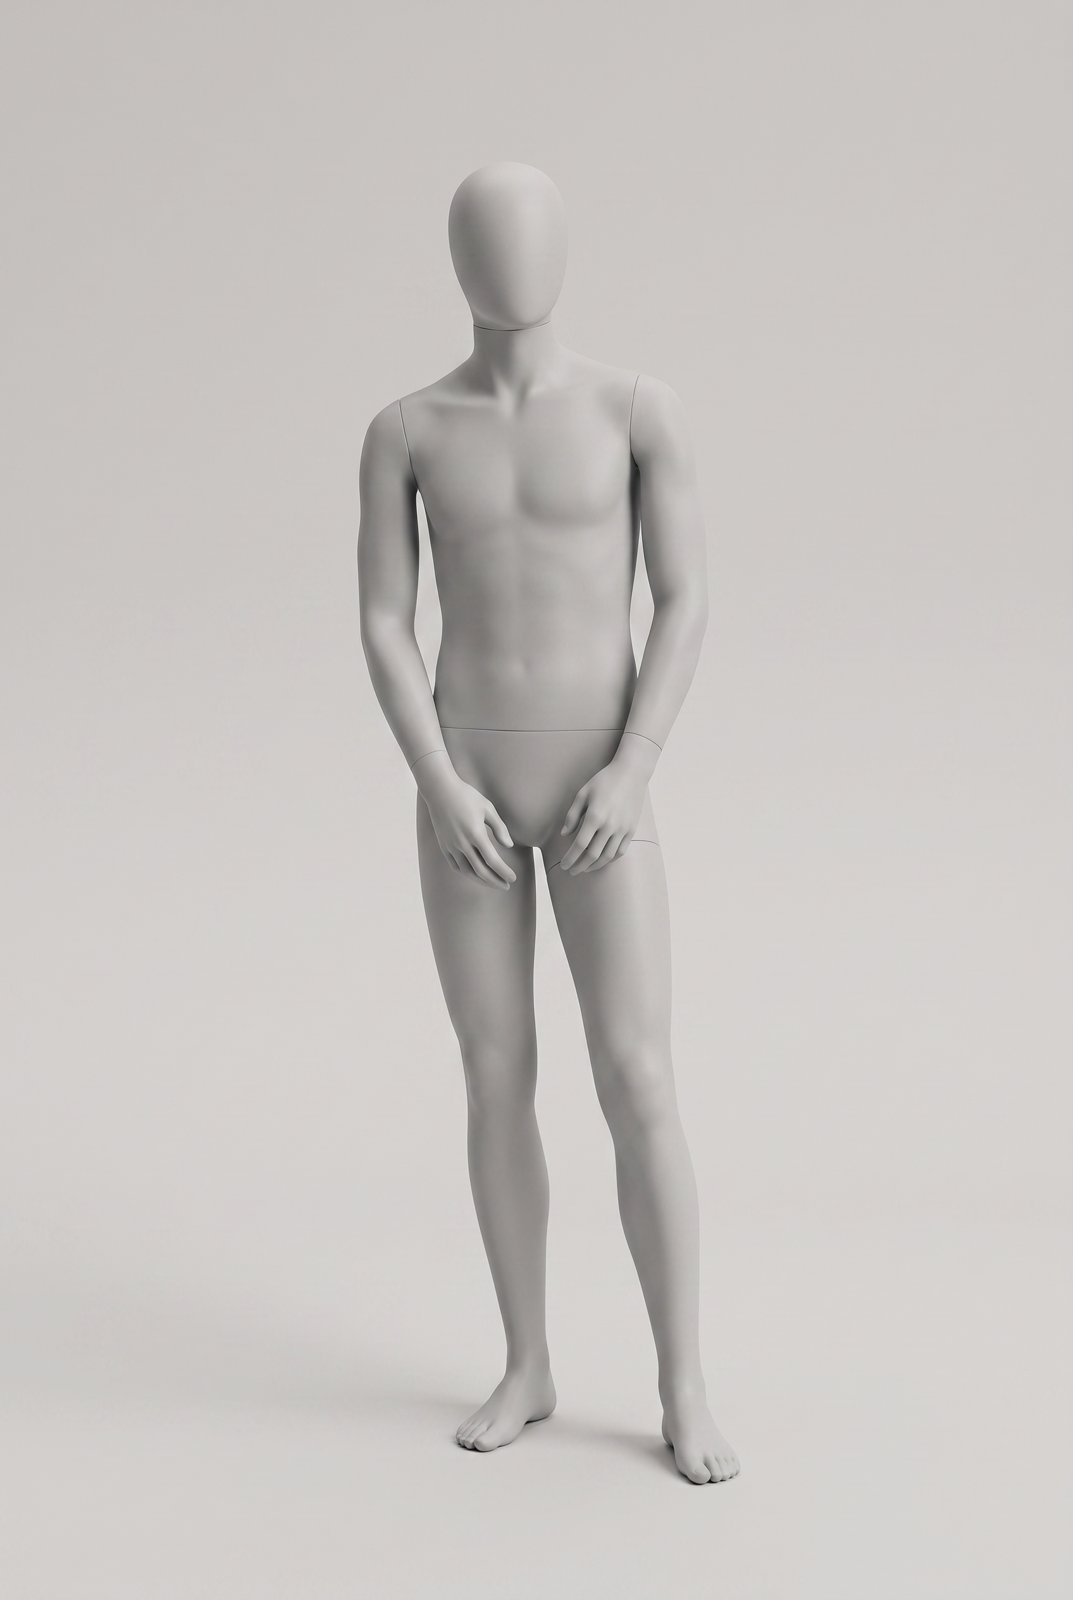
Keep the exact same matte light grey male mannequin with the same smooth surfaces, the same neutral light grey studio background, the same soft lighting and camera framing. Change only the pose: standing front-on at a slight angle, hands loosely clasped together low in front, shoulders relaxed, weight settled on one leg. Entire figure visible from head to feet.
Use it for: Composed and grounded; a strong default for lookbook menswear.
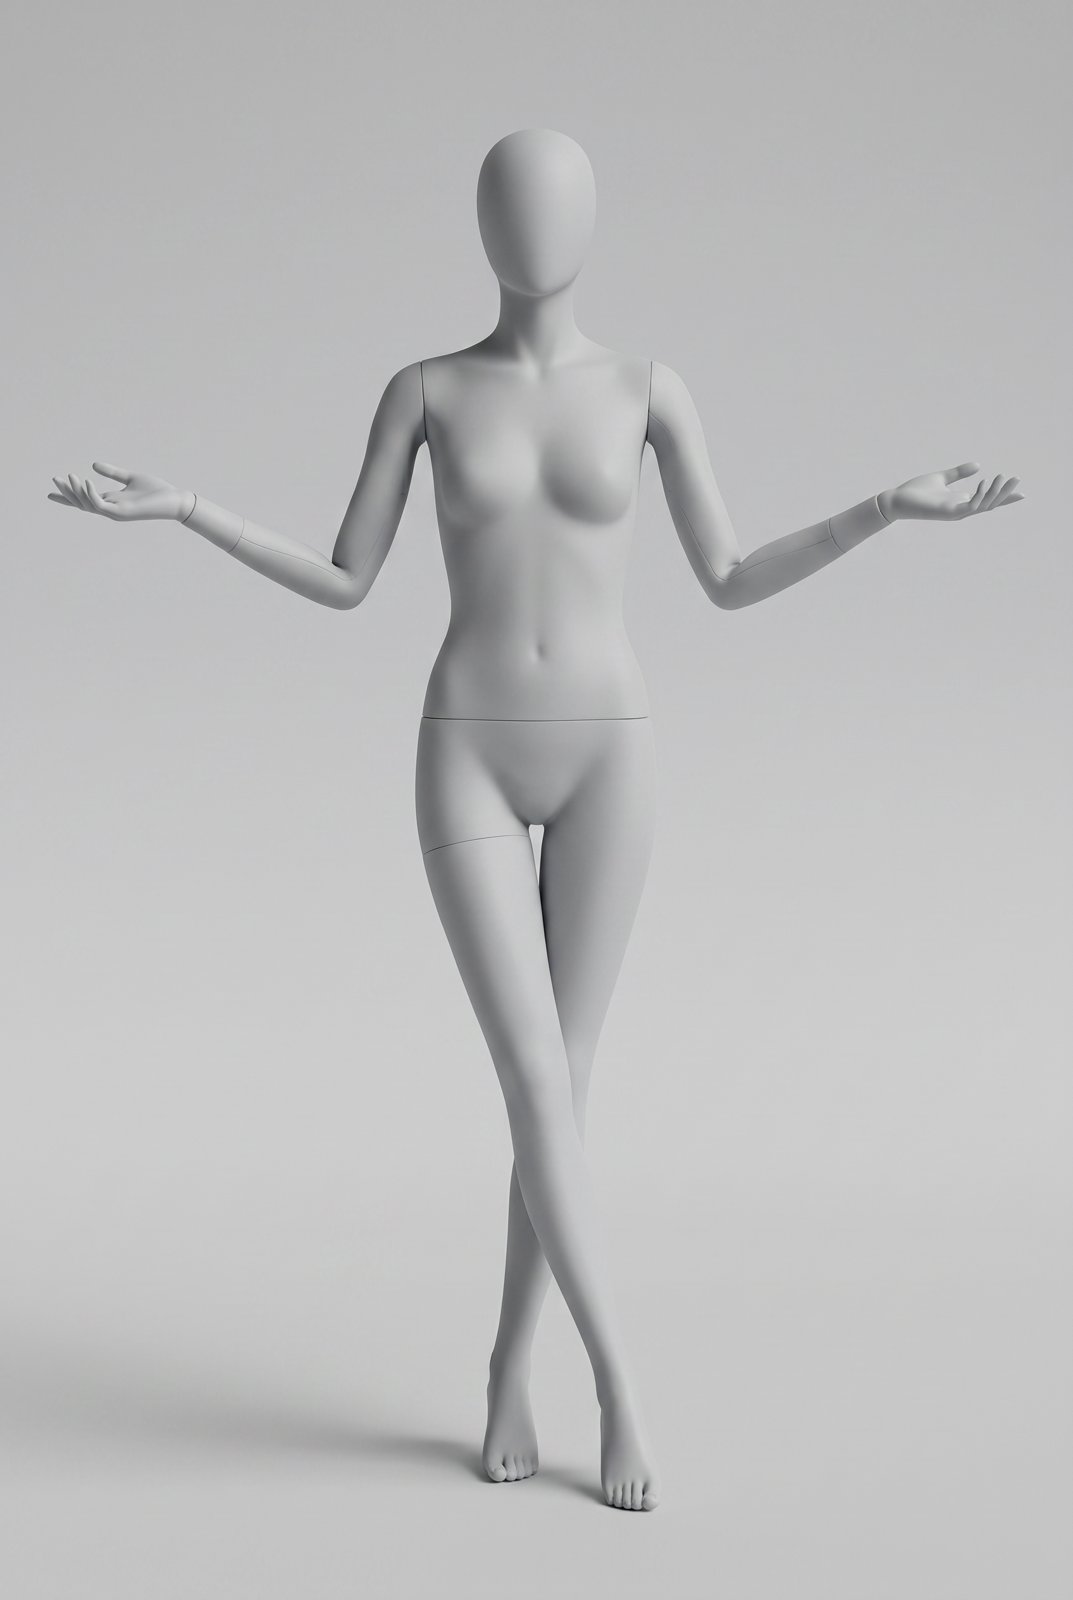
Keep the exact same matte light grey female mannequin with the same smooth surfaces, the same neutral light grey studio background, the same soft lighting and camera framing. Change only the pose: standing with both arms open wide to the sides, palms up, one leg crossed in front of the other. Entire figure visible from head to feet.
Use it for: Expressive and theatrical; made for oversized silhouettes and statement outerwear.
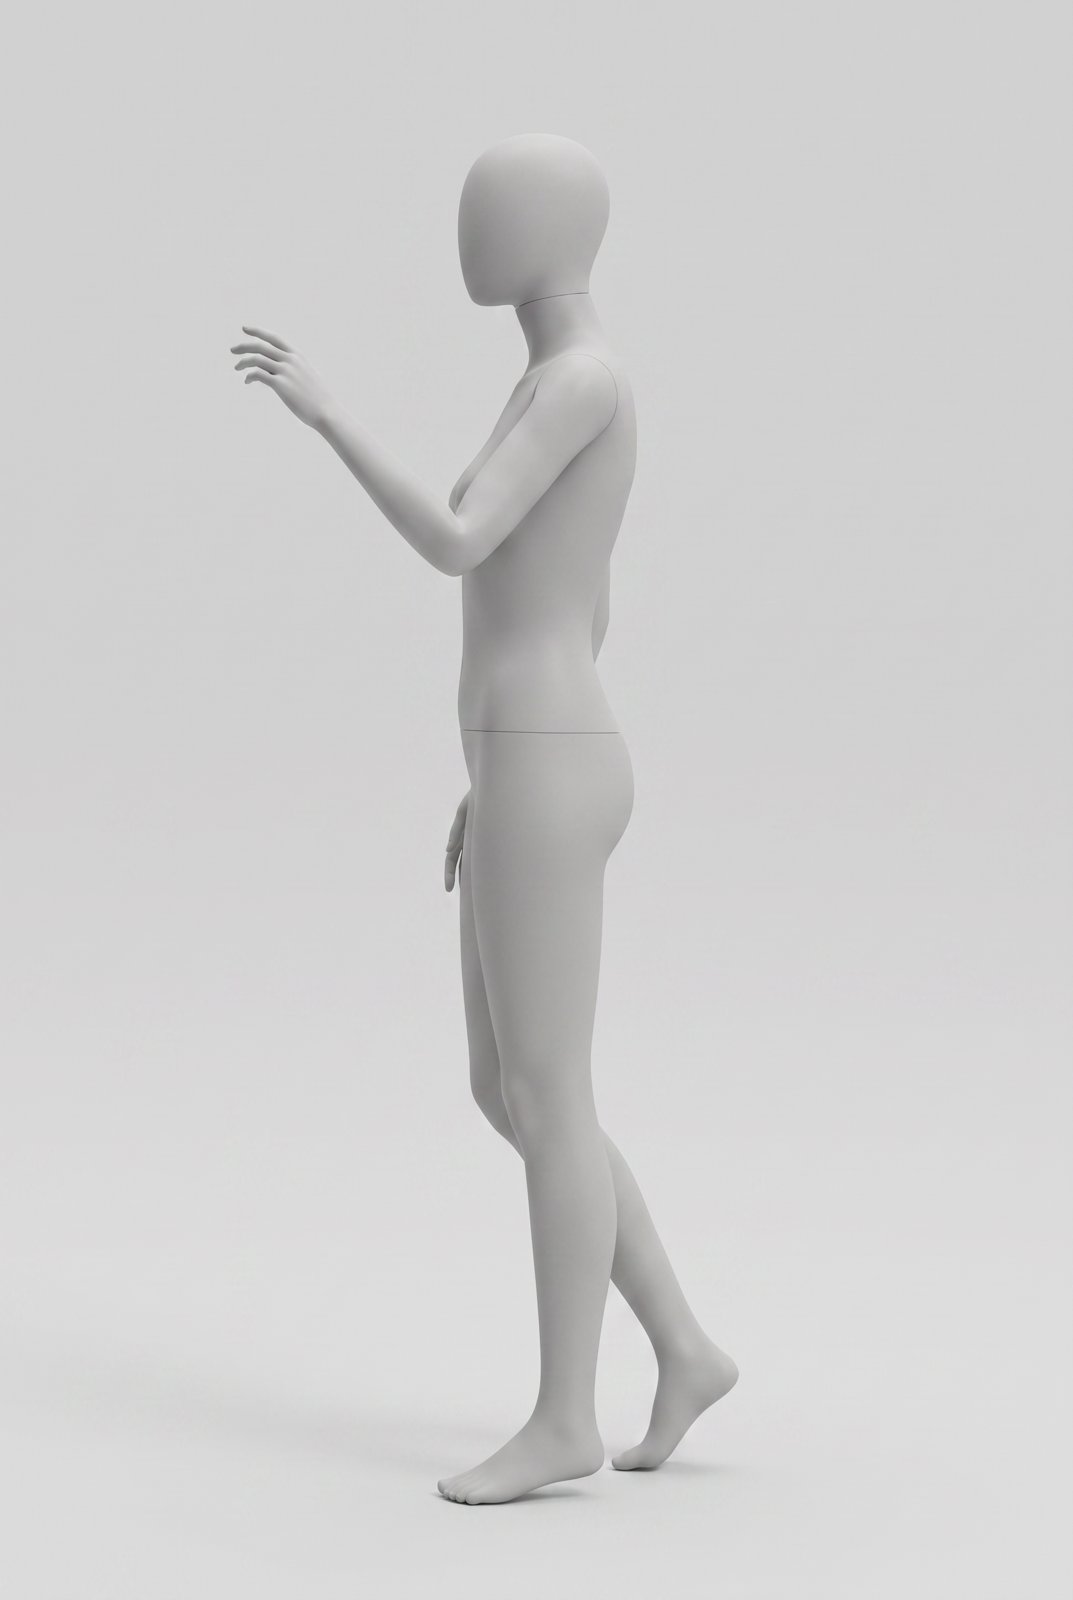
Keep the exact same matte light grey female mannequin with the same smooth surfaces, the same neutral light grey studio background, the same soft lighting and camera framing. Change only the pose: standing in side profile, one arm raised reaching forward at shoulder height with the hand gently extended, the other arm relaxed, one foot slightly behind in mid-step. Entire figure visible from head to feet.
Use it for: A narrative gesture caught mid-story; gives sleeves and drape a reason to move.
Two specialist poses that exist to show the product — now with just enough motion to stay in the same fashion register as the rest of the library.
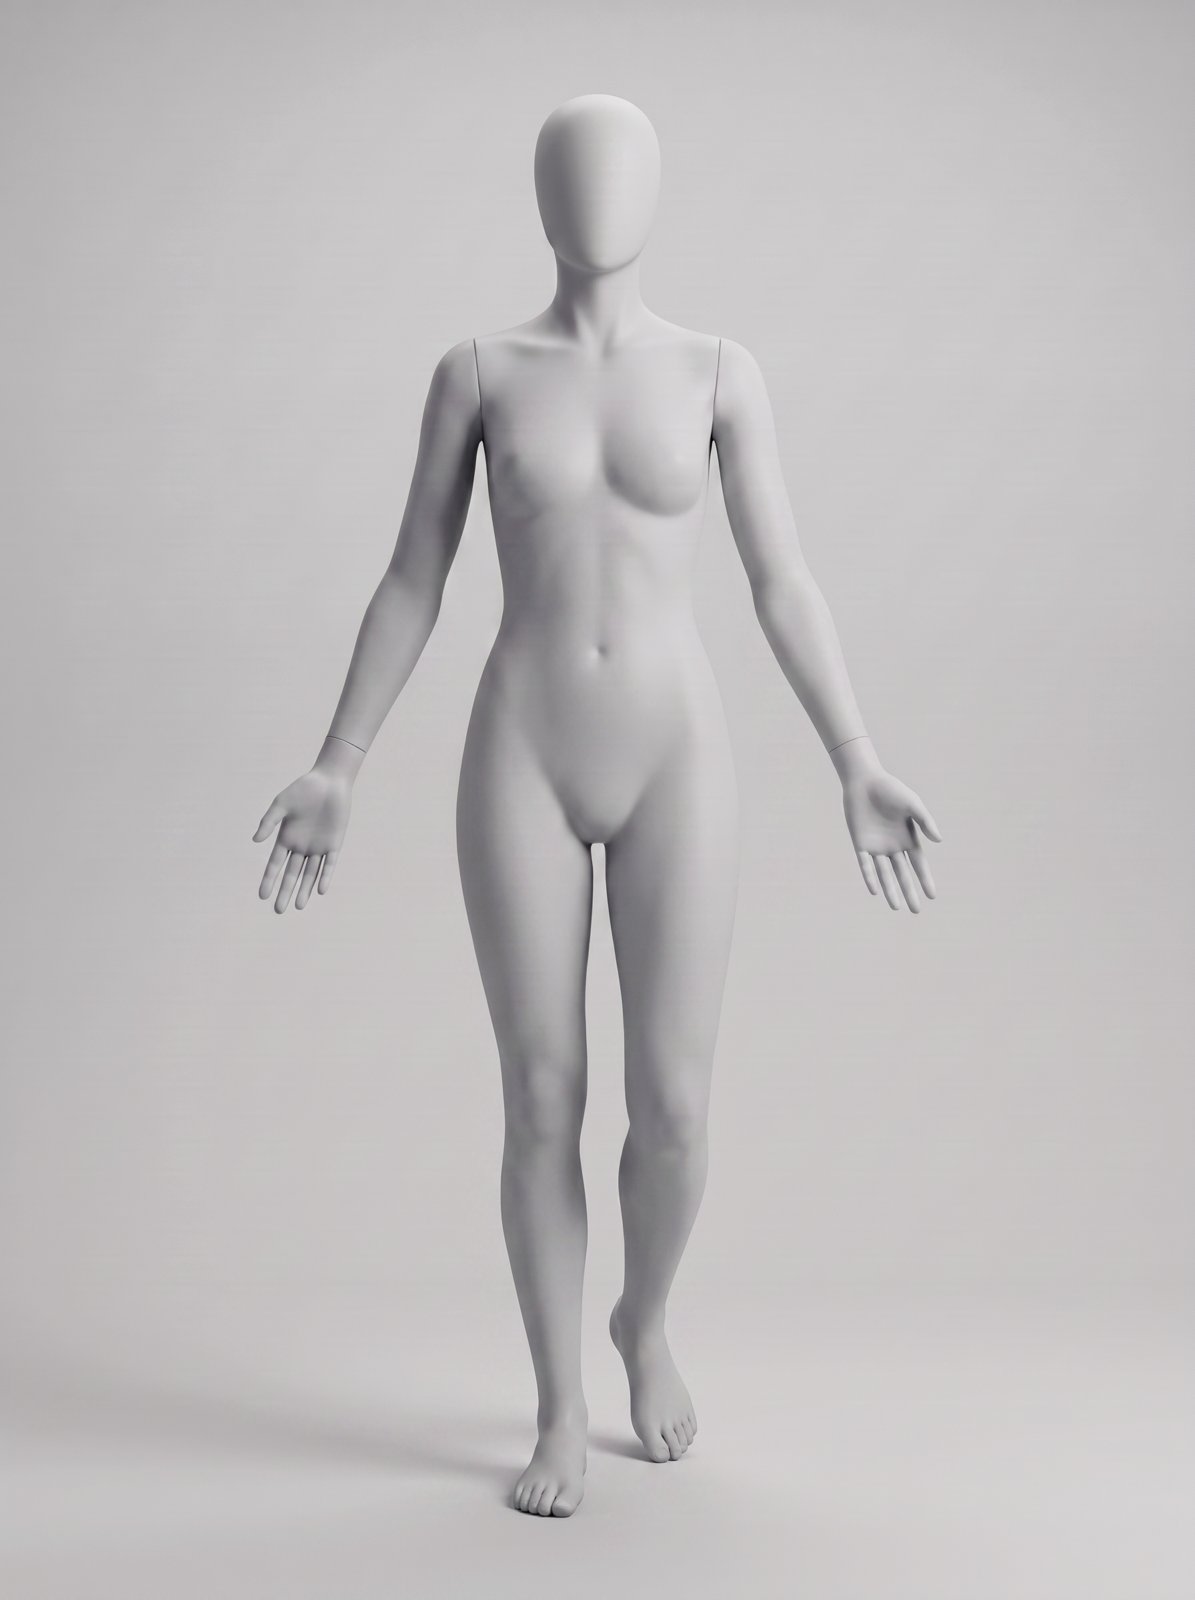
Keep the exact same matte light grey female mannequin with the same smooth surfaces, the same neutral light grey studio background, the same soft lighting and camera framing. Change only the pose: relaxed A-pose with both arms lifted away from the body, palms turned forward, one knee softly bent with the heel slightly raised as if caught mid-turn. Entire figure visible from head to feet.
Use it for: Sleeves, side seams and full silhouette stay visible, while the lifted heel keeps the frame alive. The fit-check pose.
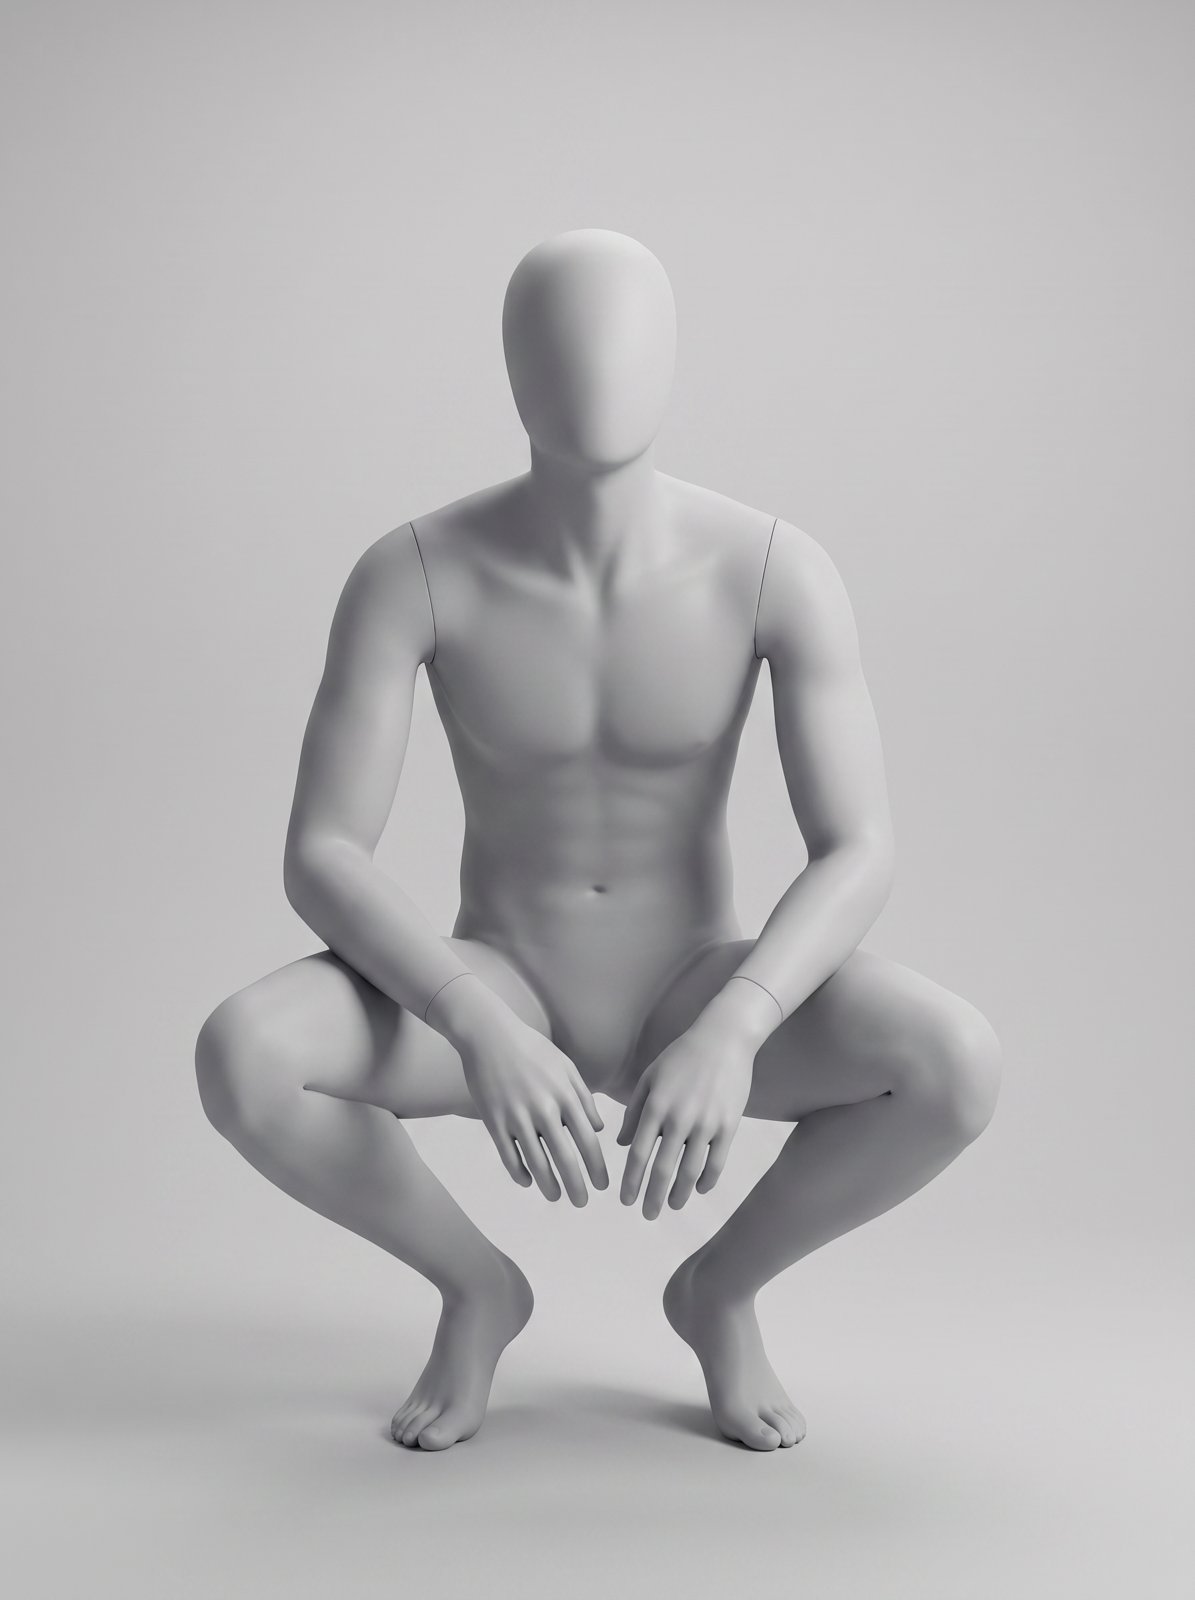
Keep the exact same matte light grey male mannequin with the same smooth surfaces, the same neutral light grey studio background, the same soft lighting and camera framing. Change only the pose: crouched low on the balls of the feet in a street-style squat, knees wide, elbows resting on the knees, hands relaxed between them, head up facing the camera. Entire figure visible from head to feet.
Use it for: The sneaker-culture frame: footwear and trouser breaks at the centre of the shot.
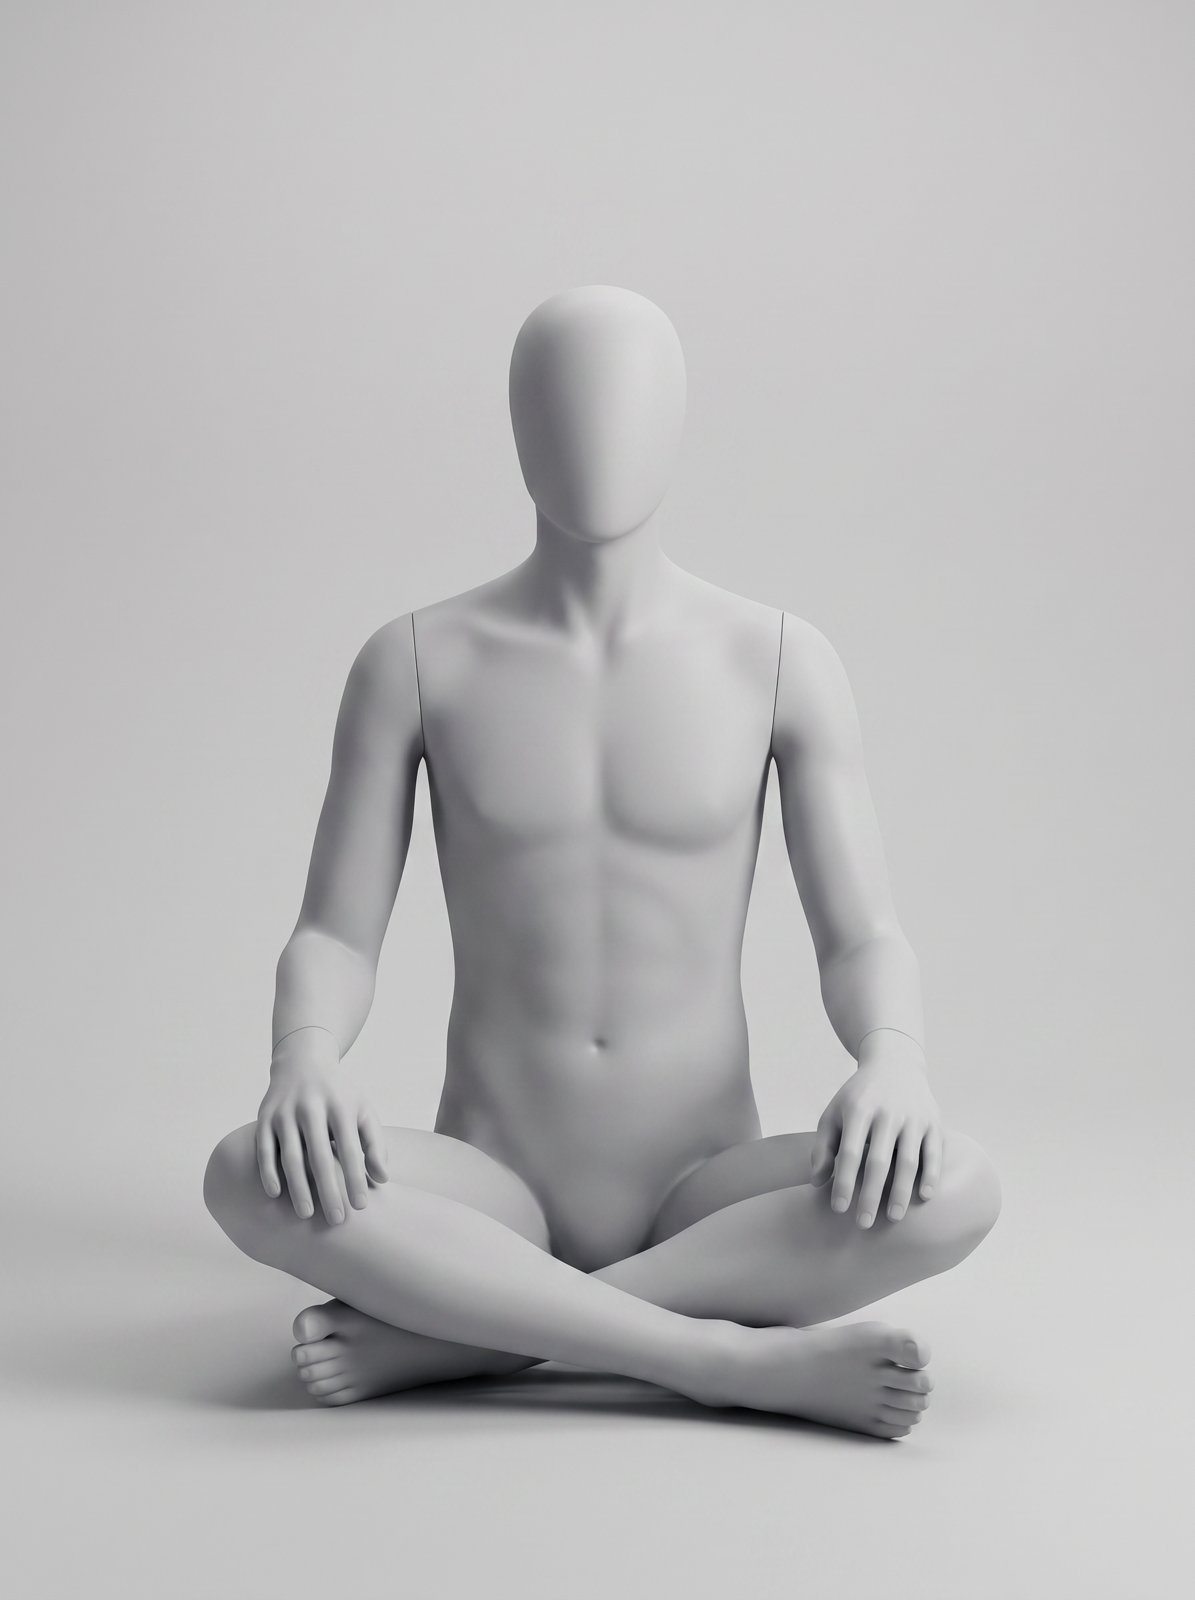
Found a pose you love in a street-style shot, a campaign image or your own archive? Load the photo as the source in Edit Image and convert the pose straight into a mannequin — that is exactly how the six street style poses above were made. The Edit Image tool has a built-in Mannequin Pose Reference template chip for the quick version:
Generate a pose mannequin out of this image. No clothing, no accessories, gray neutral mannequin, no facial features. White background. Focus on the details of the pose so it can be used as a reference image.
To keep the conversion in the same visual language as your pose library, extend the template with your set description — and name the pose explicitly, which sharply improves how faithfully it transfers. The pattern used for the street style poses:
Generate a pose mannequin out of this image, capturing the exact body pose of the person: [POSE DESCRIPTION]. Remove everything else from the photo: no clothing, no accessories, no facial features, no environment. Only the mannequin remains, a bare matte light grey retail display mannequin with a smooth featureless egg-shaped head and only subtle articulation seams, the entire body surface one even light grey tone slightly darker than the background. Seamless neutral light grey studio background, soft even diffused lighting, very light soft shadow beneath the feet, entire figure visible from head to feet, minimal e-commerce product photography style.
One practical note: without the “remove everything else” clause, props and backgrounds from the photo can survive into the render — a doorway, a handbag, a street. Name what must go.
Photo Studio is where the mannequins pay off. It dresses a model in your garments and matches the stance of whatever you place in the pose slot. The workflow:
Because the pose reference contains no person, your chosen model’s face and identity stay untouched — and because every pose reference descends from one base render, your whole catalogue holds one consistent pose language.
An AI model pose prompt is the part of an image-generation prompt that describes body position: stance, weight distribution, arm and hand placement, and head direction. Precise pose language, such as “weight shifted onto the back leg, arms relaxed at the sides,” produces repeatable results; vague words like “dynamic pose” do not.
A person in a pose reference can pollute the generated model’s identity: the face, skin tone or hair may drift toward the reference person. A featureless grey mannequin carries only the pose, so your cast model stays exactly who you chose. It is also free of any model likeness rights.
Do not generate each pose as a separate text-to-image run — that produces a different mannequin every time. Generate one base mannequin in Create Image, then create every pose as an Edit Image variation of that render. The source image anchors the mannequin’s material, the background and the lighting.
Yes. In the Edit Image tool, load the photo as the source image and use the built-in Mannequin Pose Reference template. It converts the person’s pose into a neutral grey mannequin you can use anywhere a pose reference is accepted.
Describe four things explicitly: where the weight sits, what each arm is doing, the direction of the head, and the camera framing. Then keep everything else fixed by prompting Edit Image to “change only the pose” on your base render, so the pose is the only variable between generations.
Generate your base mannequin in Create Image, move it through every pose with Edit Image, and drop the renders into Photo Studio as pose references. Sign up free at app.thefabricant.com and shoot an entire collection in one consistent pose language.