
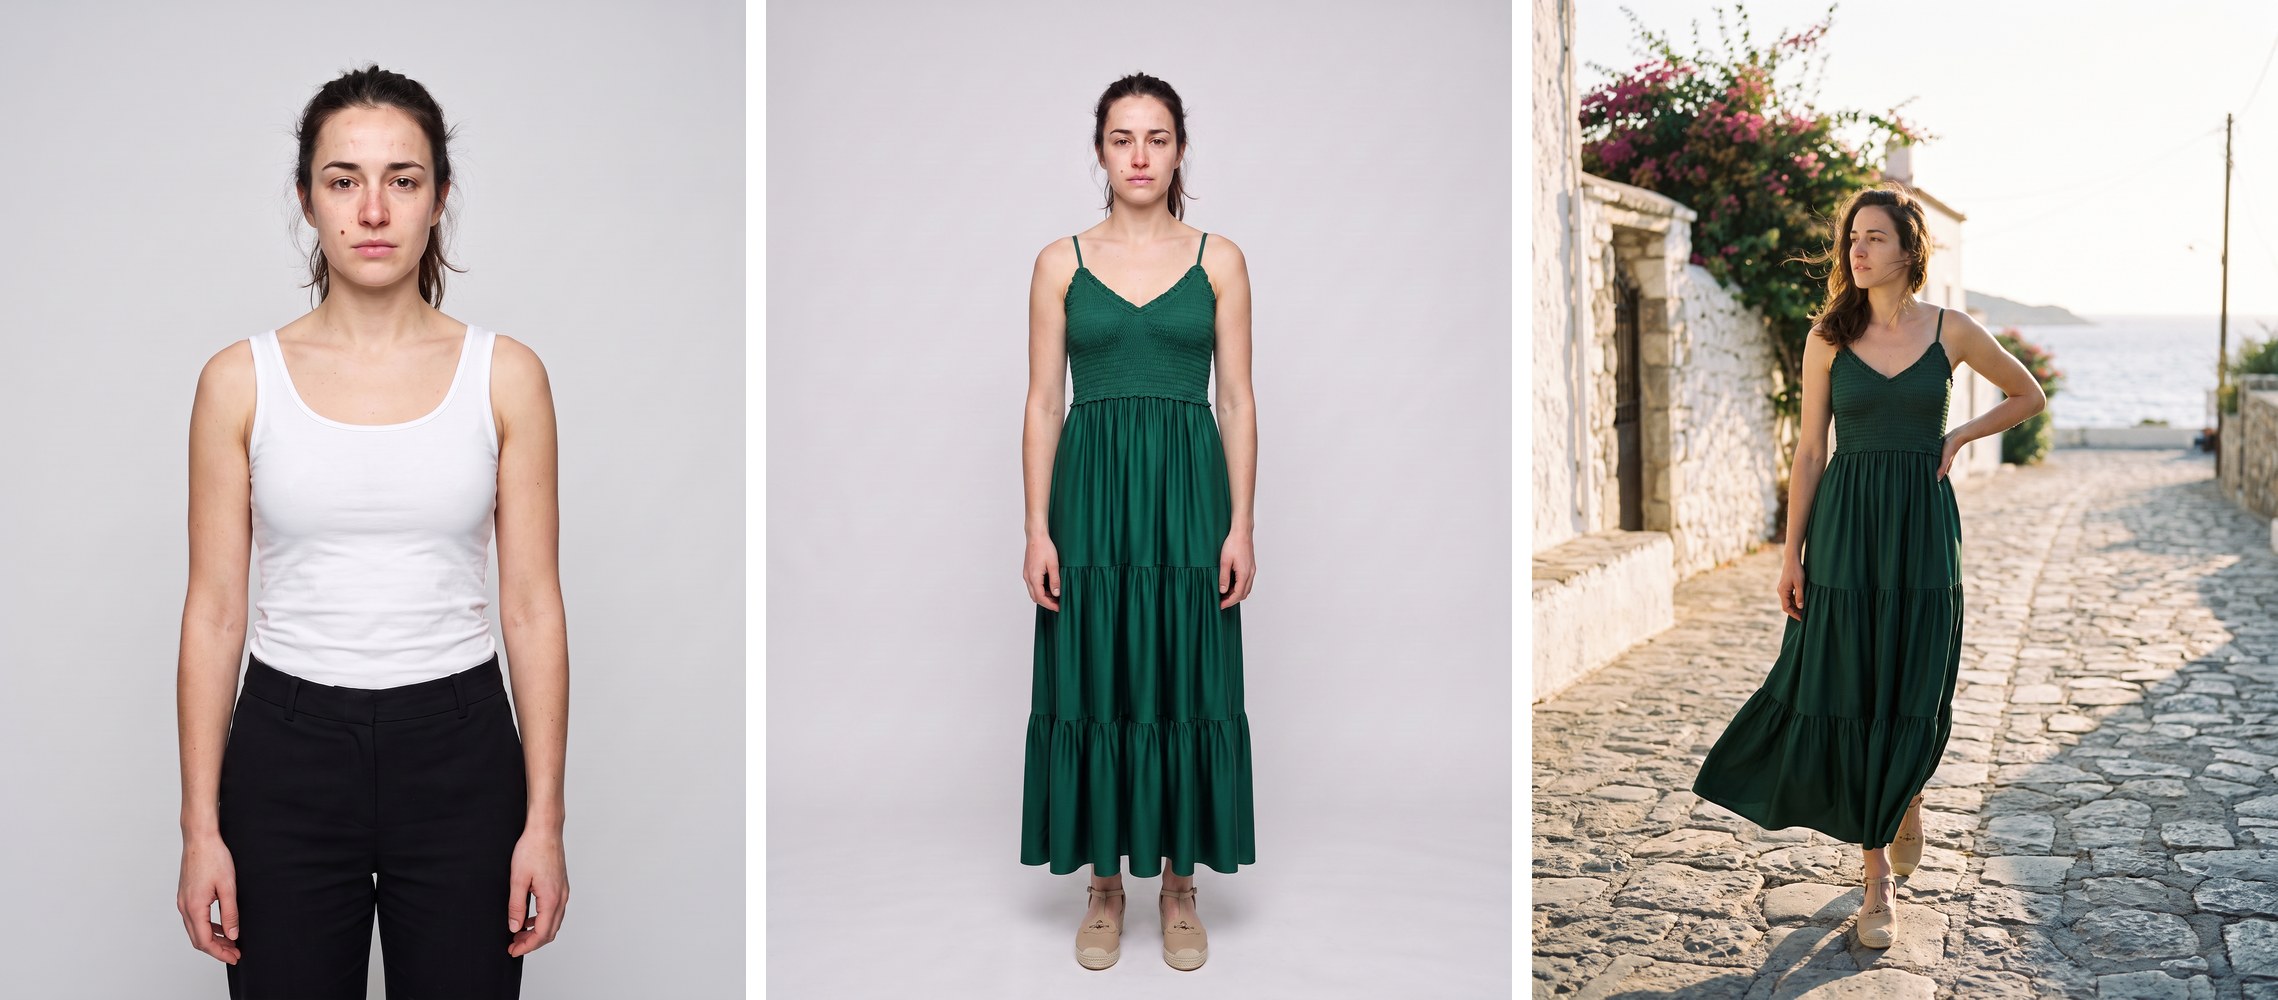
Generating one beautiful AI model image is easy. Generating the same model again next week, wearing a different garment, in a different pose, for the next drop of your collection, is the part most teams get stuck on. The same prompt produces a different face every time you run it, so without a proper workflow your model changes identity from shot to shot.
The Fabricant and the Intelligent Tools are extremely powerful for model consistency, and this post explains the exact workflow we teach our clients: cast the model once, build a set of character cards, and then reuse those cards in every future generation. This is something general-purpose image tools such as Gemini Nano Banana Pro do not really support from a workflow perspective, or make much harder to maintain, because they have no persistent model library, no fashion-specific tools to load your model into, and no saved workflows to rerun the whole process for the next model. Every image in this guide was generated on app.thefabricant.com using the steps below.
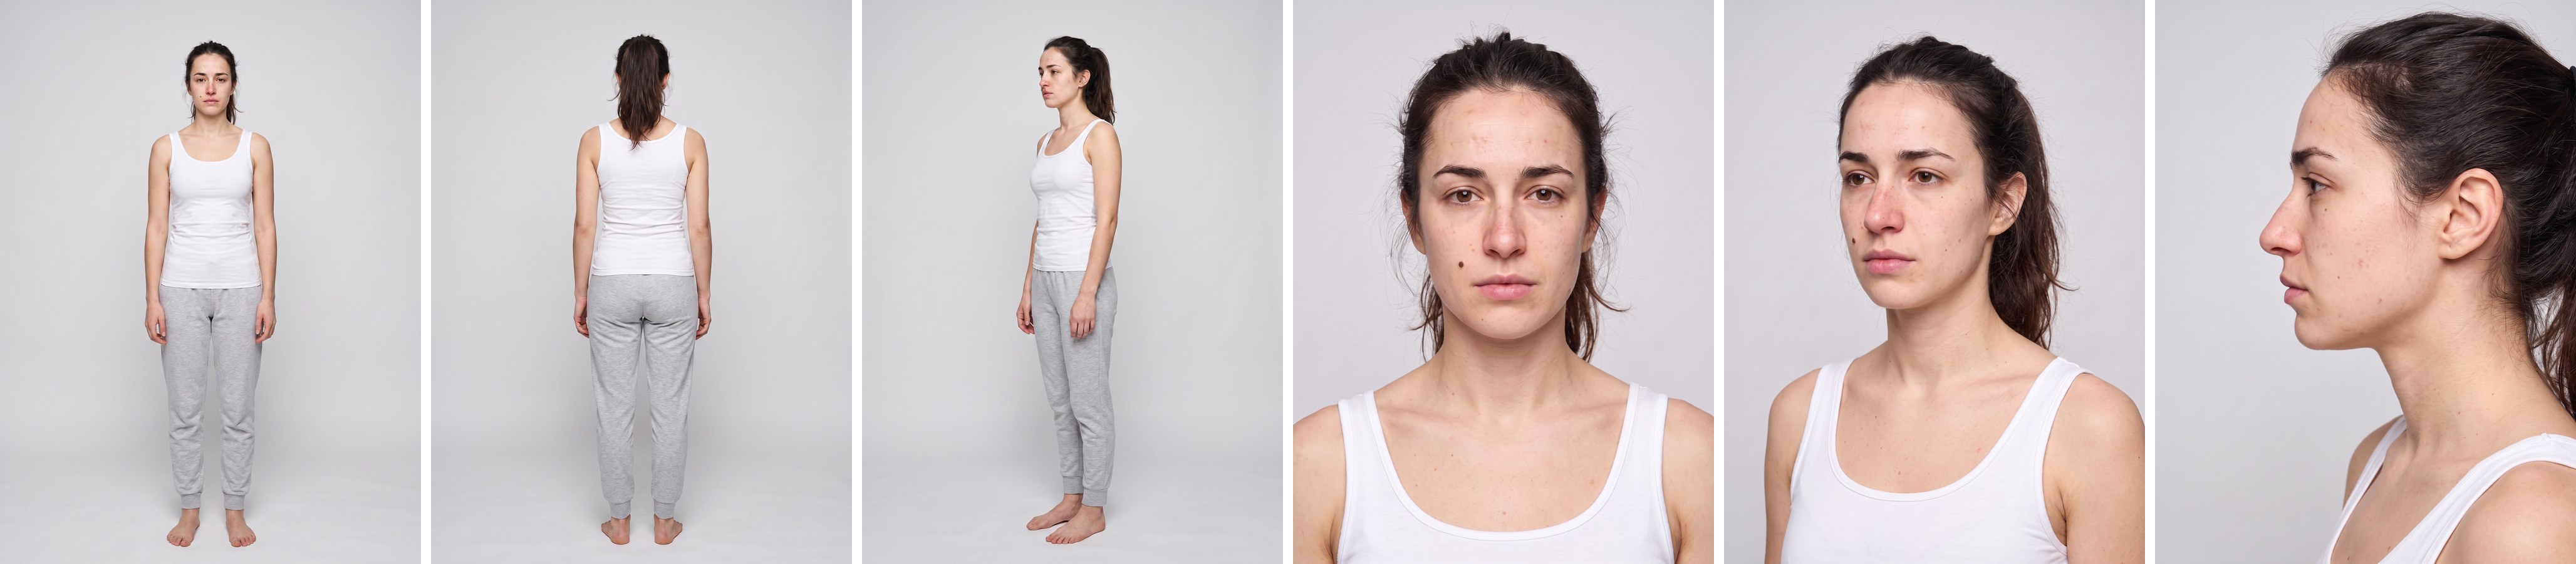
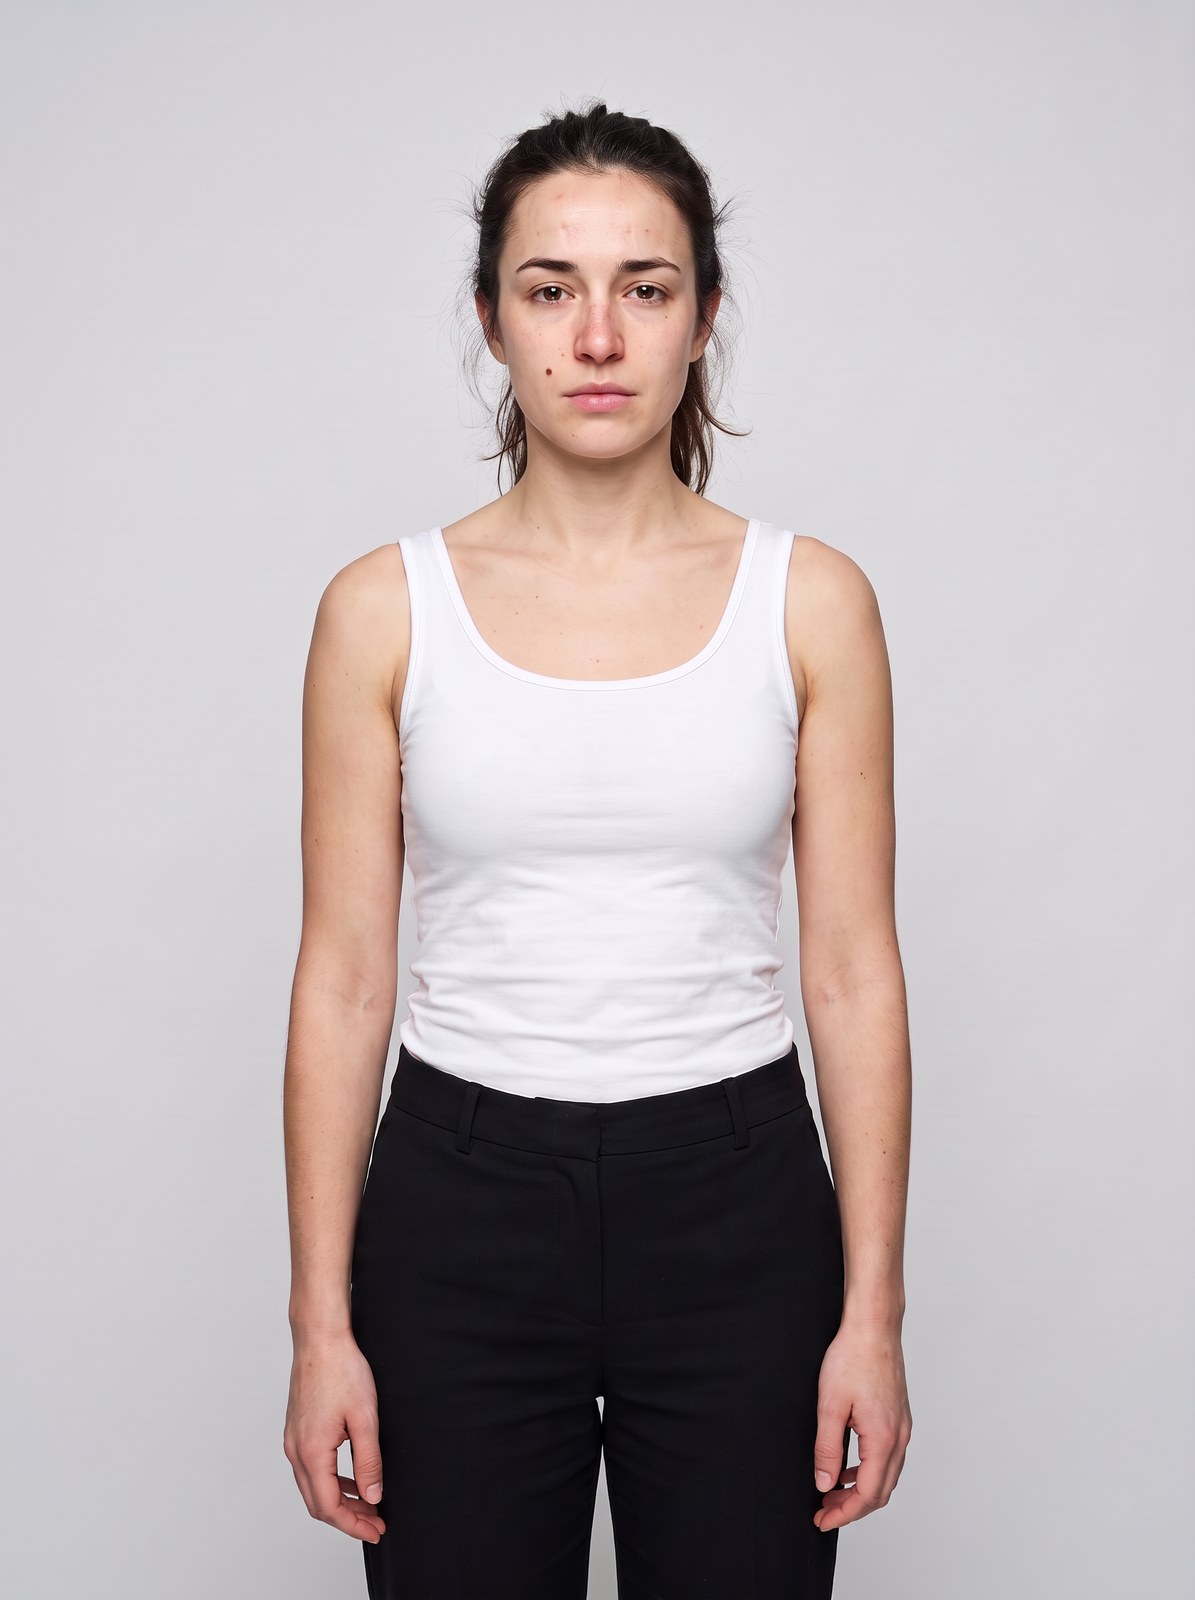
Image models do not remember faces between generations. A text prompt describes a type of person, not a specific person, so every run samples a new face that fits the description. Saving your prompt as a template does not solve this either: a template saves the words, not the model. The solution is to stop relying on the prompt for identity and start using reference images of your model in every downstream generation. That is what this workflow builds.
The realism comes from deliberately prompting asymmetries and imperfections. Perfectly symmetrical faces read as AI; named flaws read as photography. This focus on asymmetries and imperfections is also why results from this workflow look convincingly human, which is something many other platforms struggle with.
Open Create Image, set High Quality mode, a 3:4 ratio and 2K resolution, and structure the casting prompt in five layers:
1. Shot setup: shot type, subject, backdrop and stance in one opening line.
2. Named asymmetries: be specific about eyes, brows, nose bridge and hairline. A vague "imperfect face" does not work.
3. Named skin detail: pores, scarring, freckles, a mole, redness, fine lines. These details survive into every later shot.
4. Hair, build and wardrobe: hair with flaws such as flyaways and baby hairs, then build and a neutral base wardrobe.
5. Light and camera: even studio light, true skin tones, medium format language.
The prompt used for the model in this guide:
Ultra-realistic full-body portrait of a female fashion model in her mid twenties standing against a seamless light-grey studio backdrop, relaxed neutral stance, direct gaze. Naturally asymmetric face: right eye fractionally lower than the left, one eyebrow sitting slightly higher, a subtly uneven nose bridge, softly uneven hairline. True-to-life skin with visible pores, faint acne scarring on the forehead, light freckles across the nose and cheekbones, a small dark mole on the left cheek, mild redness around the nostrils, fine expression lines at the corners of the eyes, slightly chapped lips. Dark brown hair tied back loosely with natural flyaways and baby hairs at the temples. Lean athletic build, wearing a plain white fitted tank top and straight-leg black trousers. Soft even studio key light with gentle fill, true skin tones, razor-sharp focus, shot on medium format digital, fashion campaign casting imagery
A character card set is a group of reference images of the same model from different angles. Load the casting image as the source in Edit Image, keep High Quality and 2K, and generate six cards: three full-body views (frontal, back and left side) in a neutral outfit, and three face close-ups (front, three-quarter and side profile). The close-ups carry the facial detail that keeps your model consistent later.
Because Edit Image works from your source image, every card shows the same woman. The prompt only needs to change the view:
Generate a frontal full body view of the model, 175cm tall. Head to toe. Barefeet. The model is wearing a white singlet and light grey jogging pants.
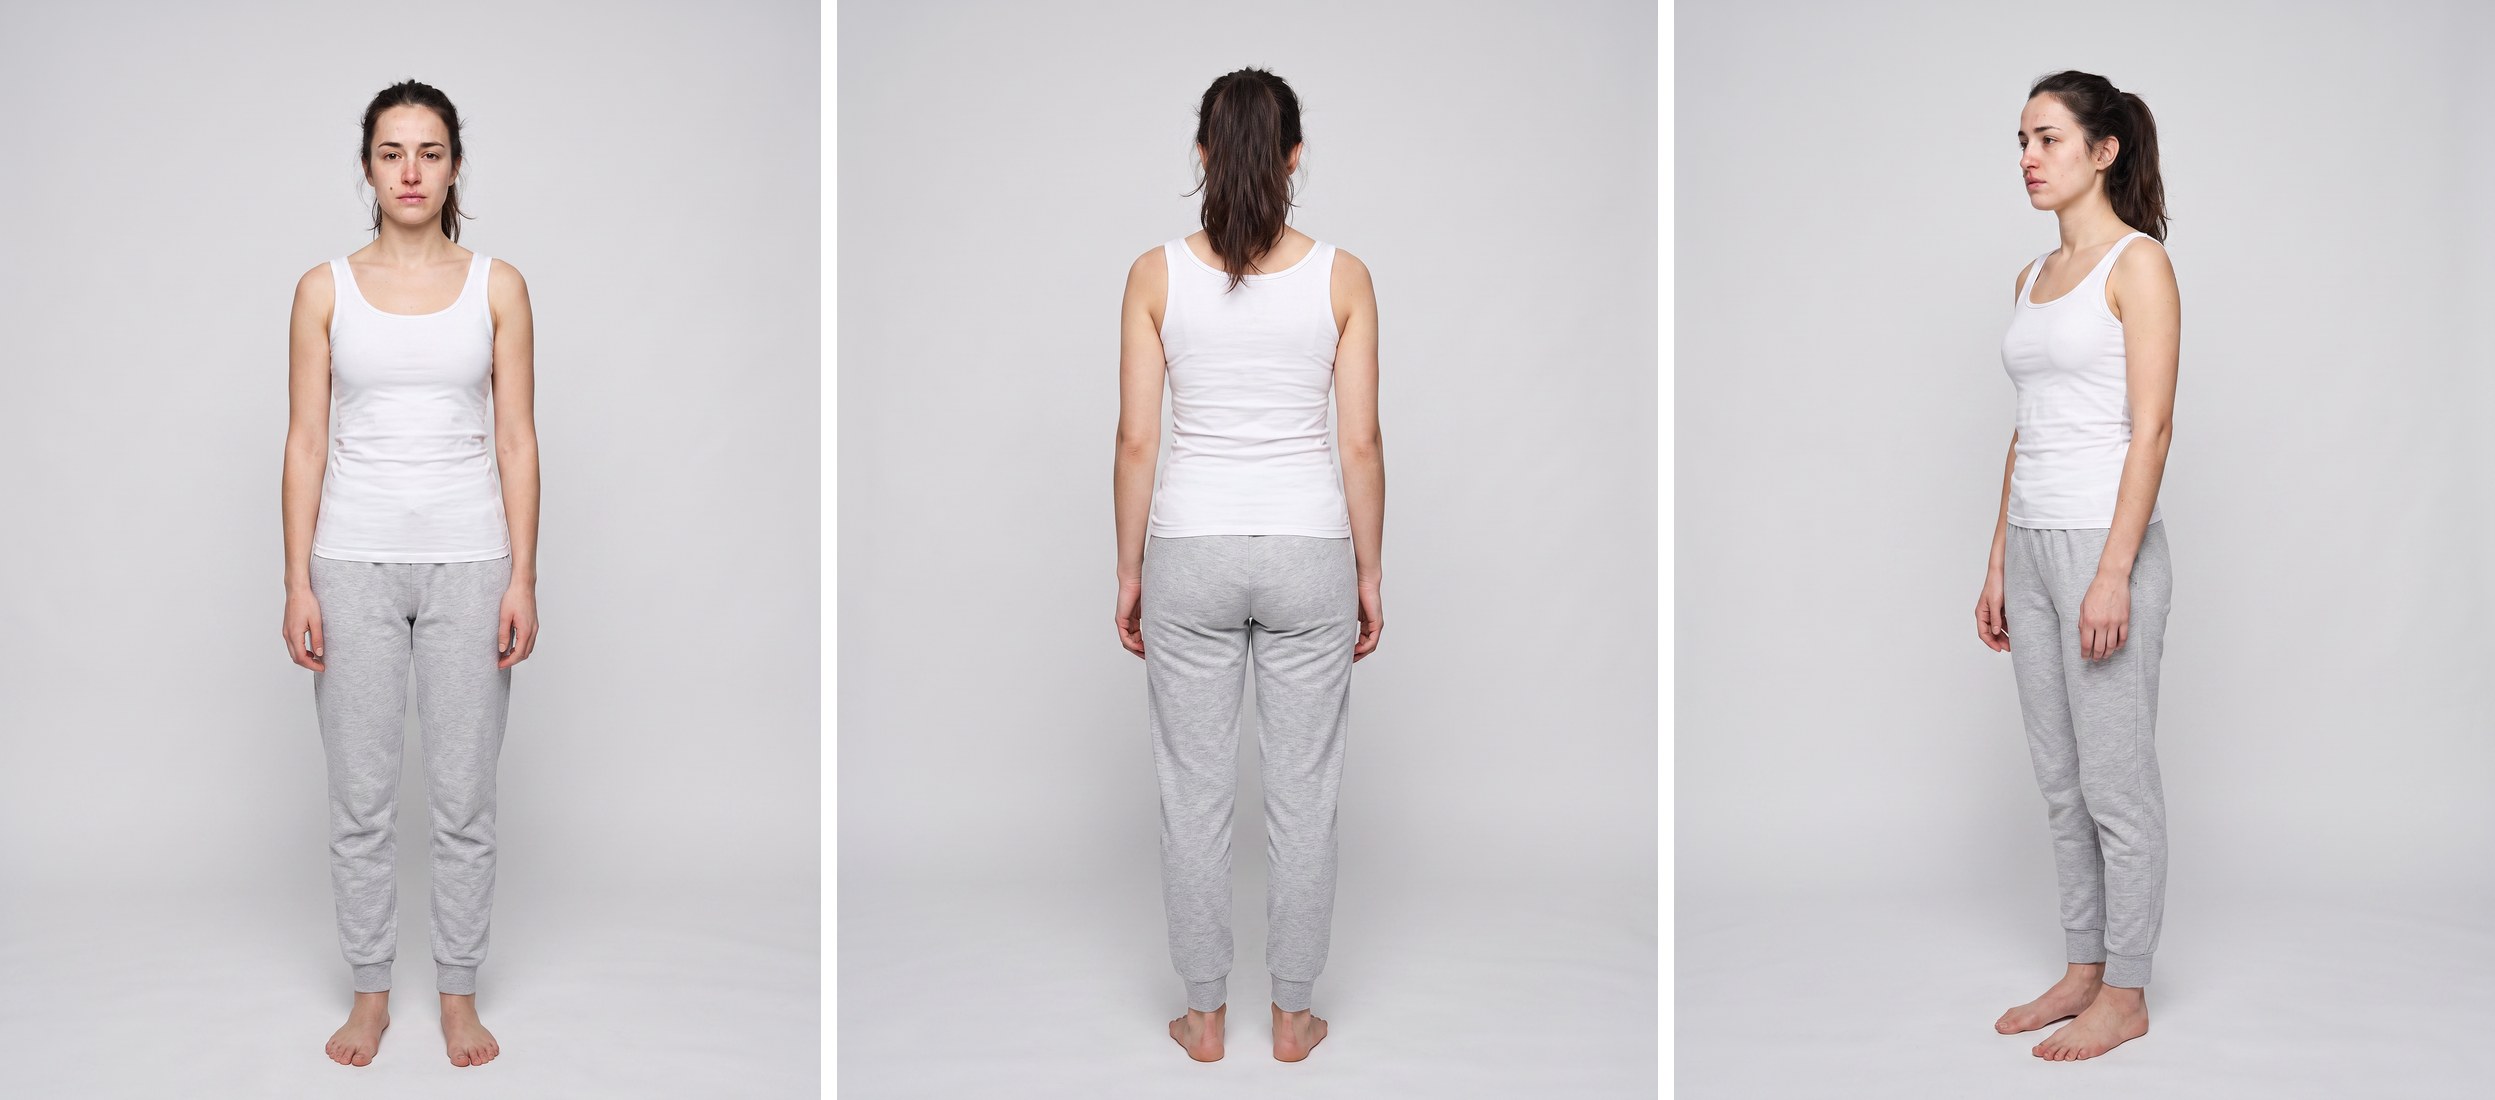
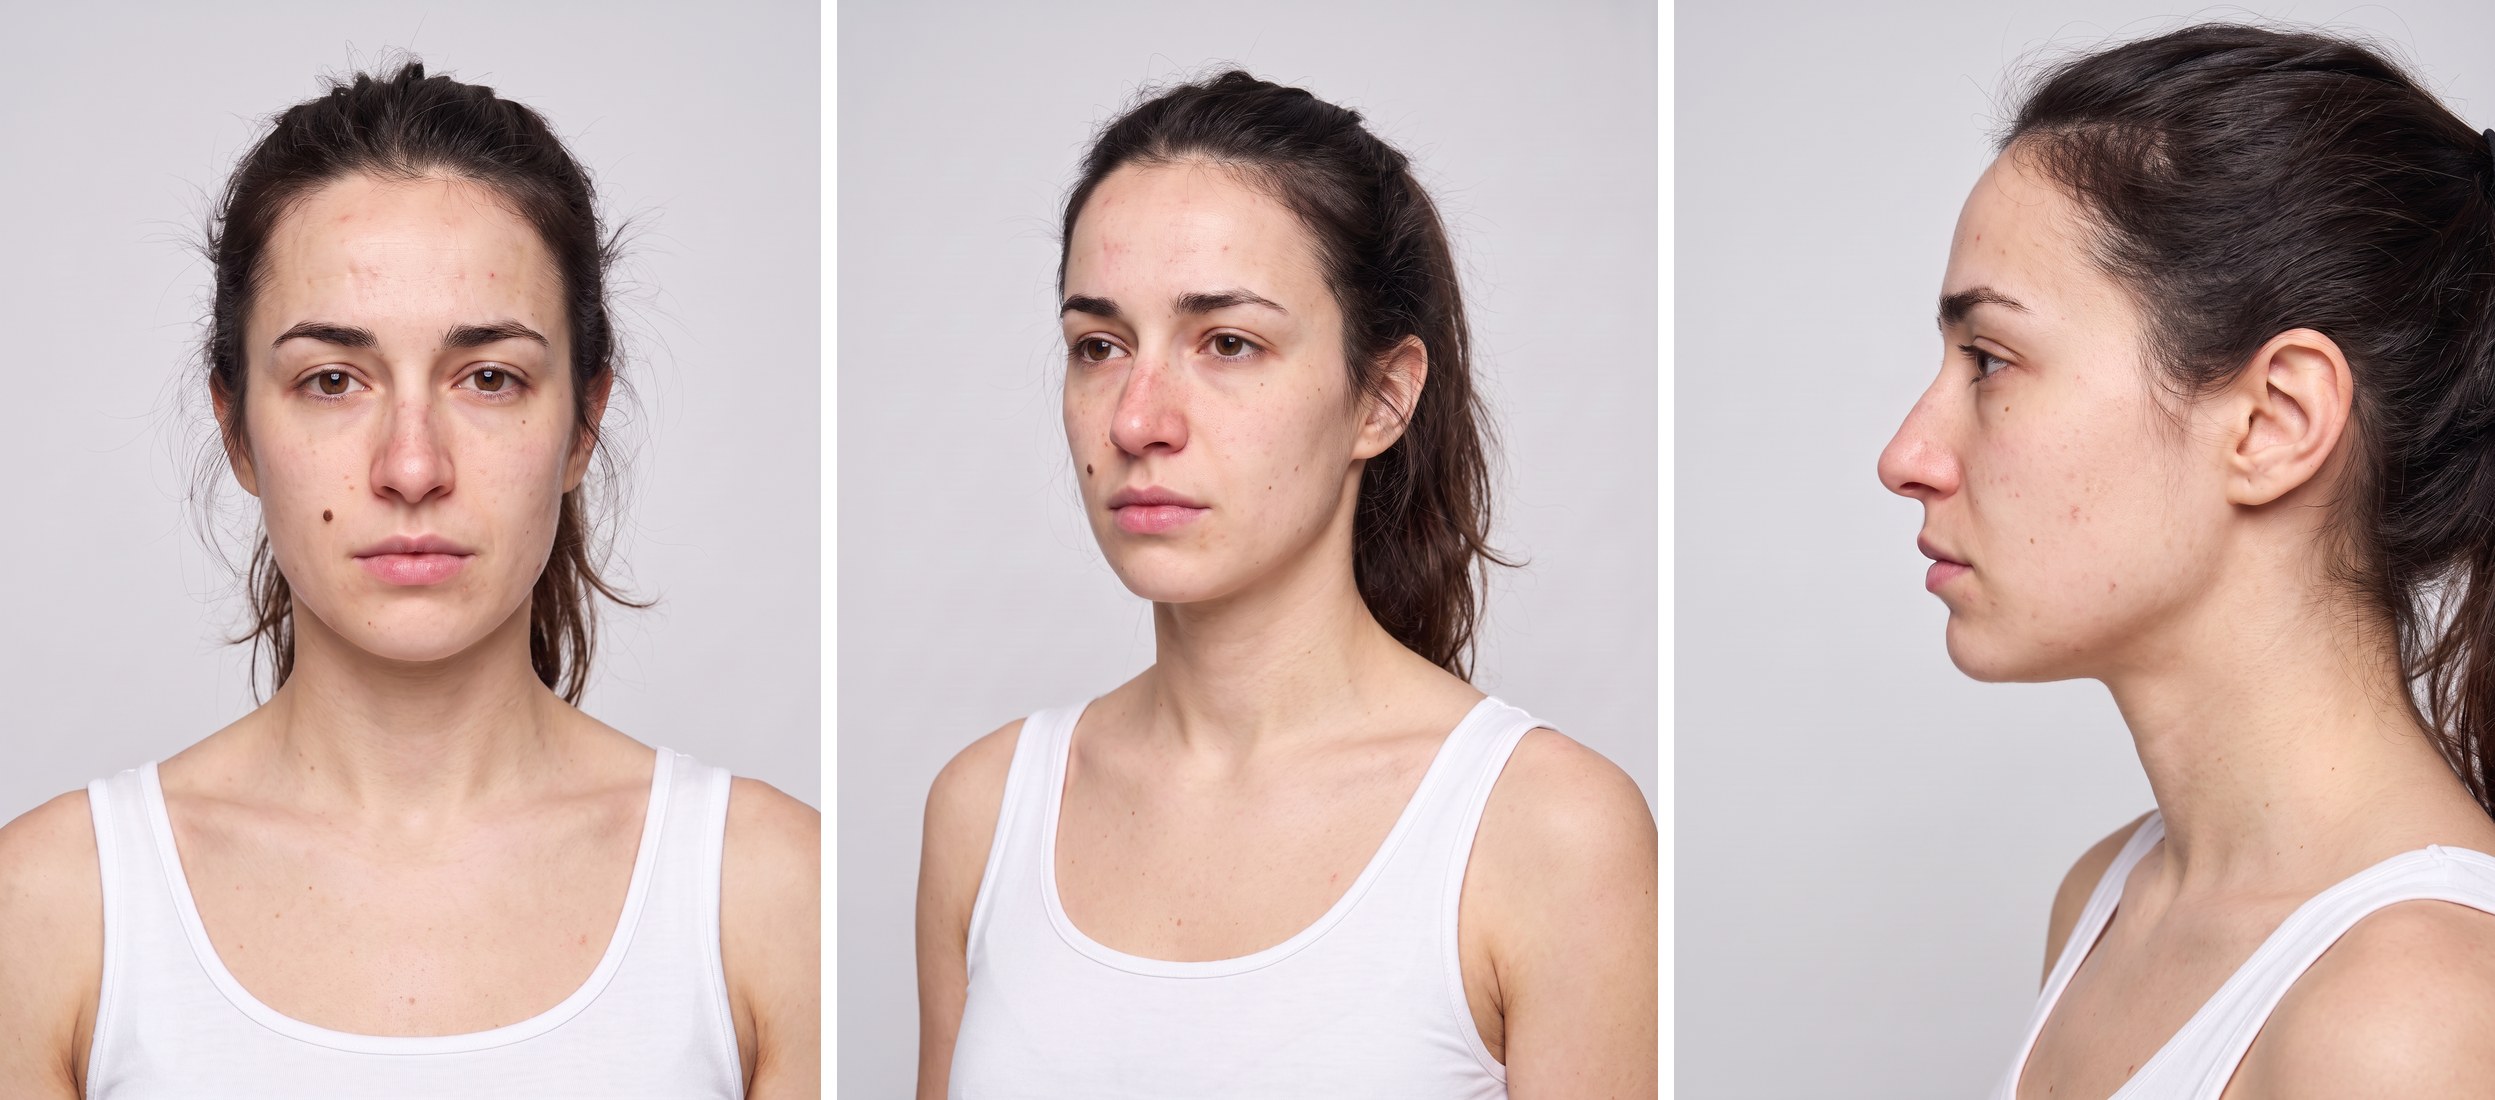
Create a folder per model in My Library and keep the casting image and all six cards together. When your team casts more models, each one gets its own folder, so anyone on the team can pick up the right card set for the right shot.
This is where the consistency pays off. Photo Studio dresses a person in your garments, and the trick is to use two cards at once. In the person slot, load the full-body card that matches your shot angle: frontal card for frontal shots. In the garment slots, load your garment images, plus the face close-up card. The close-up gives the generation a high-resolution reference for the facial details.
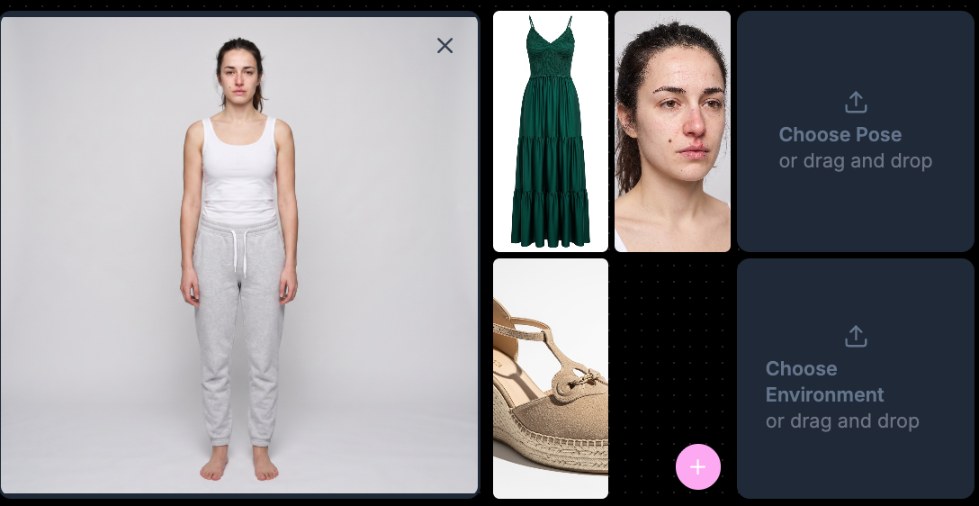
Then tell the prompt what the extra image is, by ending with:
The close-up portrait is a face reference only: keep the exact same woman with the identical face, features and hair.
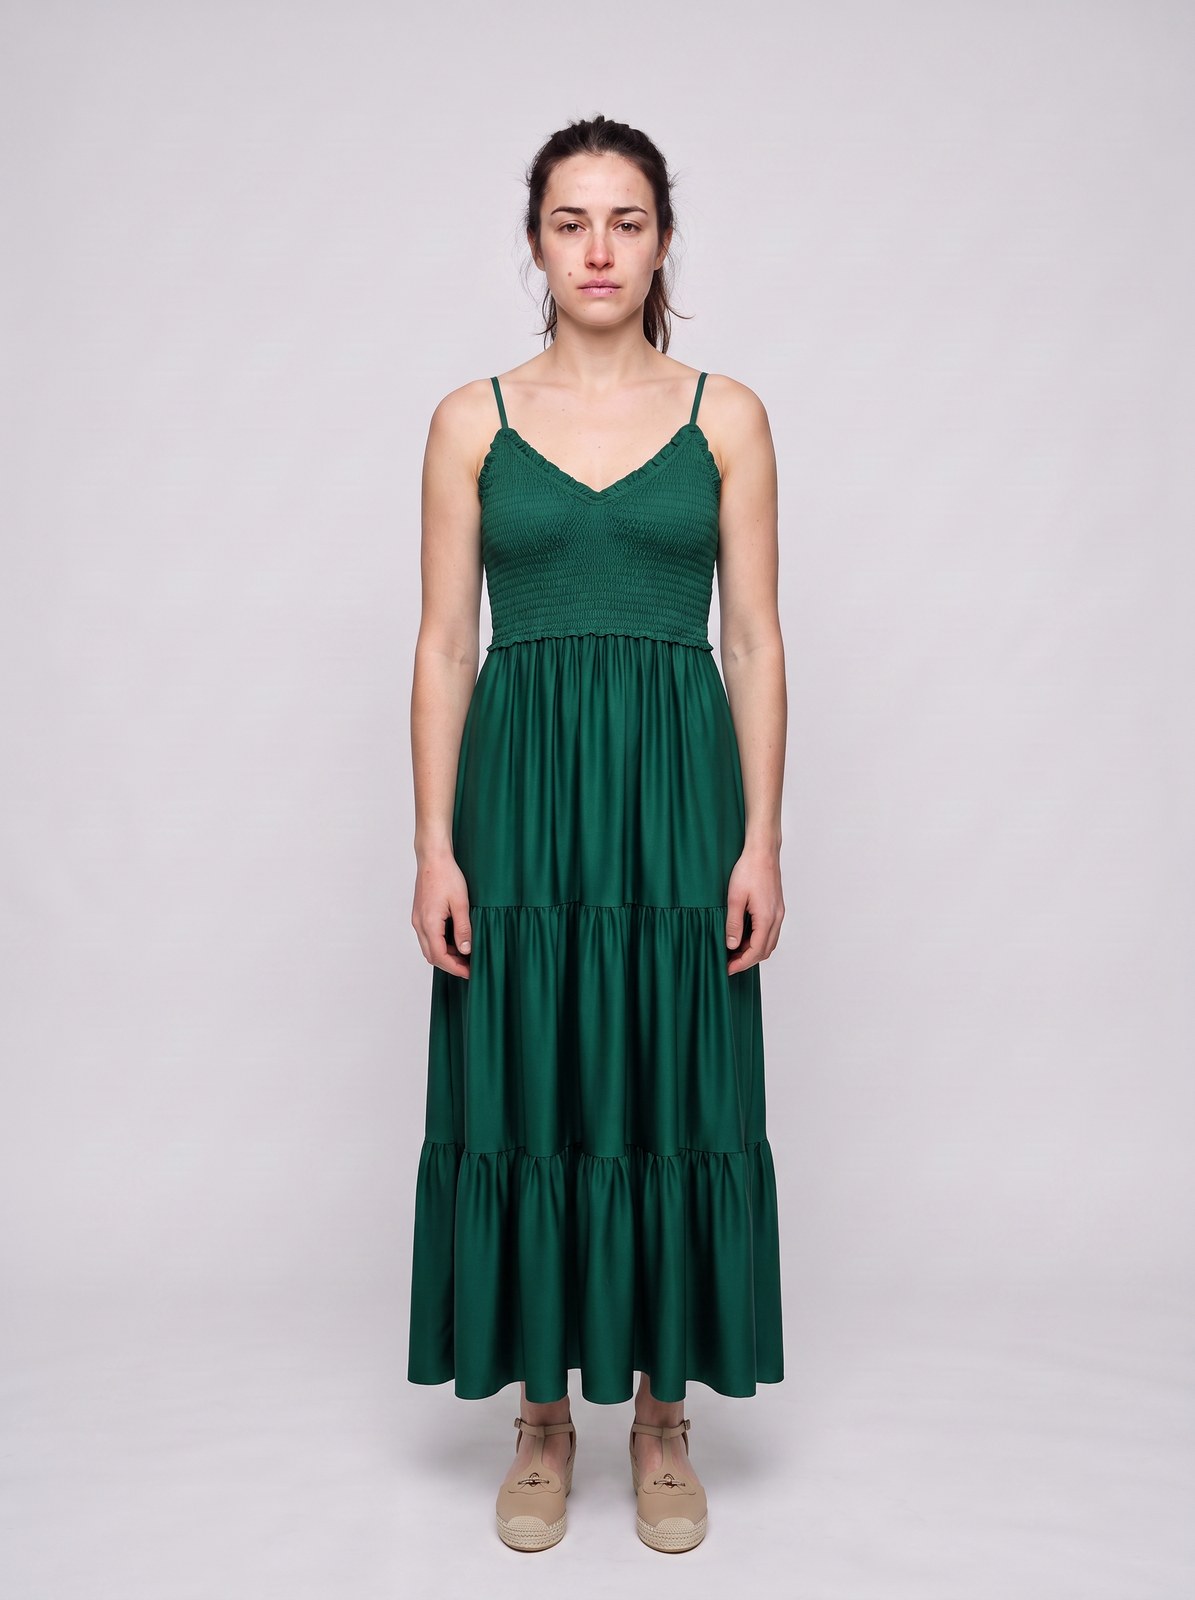
Repeat this for every garment in the collection and every shot uses the same model.
The same identity clause travels into Editorial for campaign shots. Open every downstream prompt with "keep the exact same woman with the identical face, features and hair", then describe the scene, light and movement you want. The garments and the model stay consistent while the setting changes.
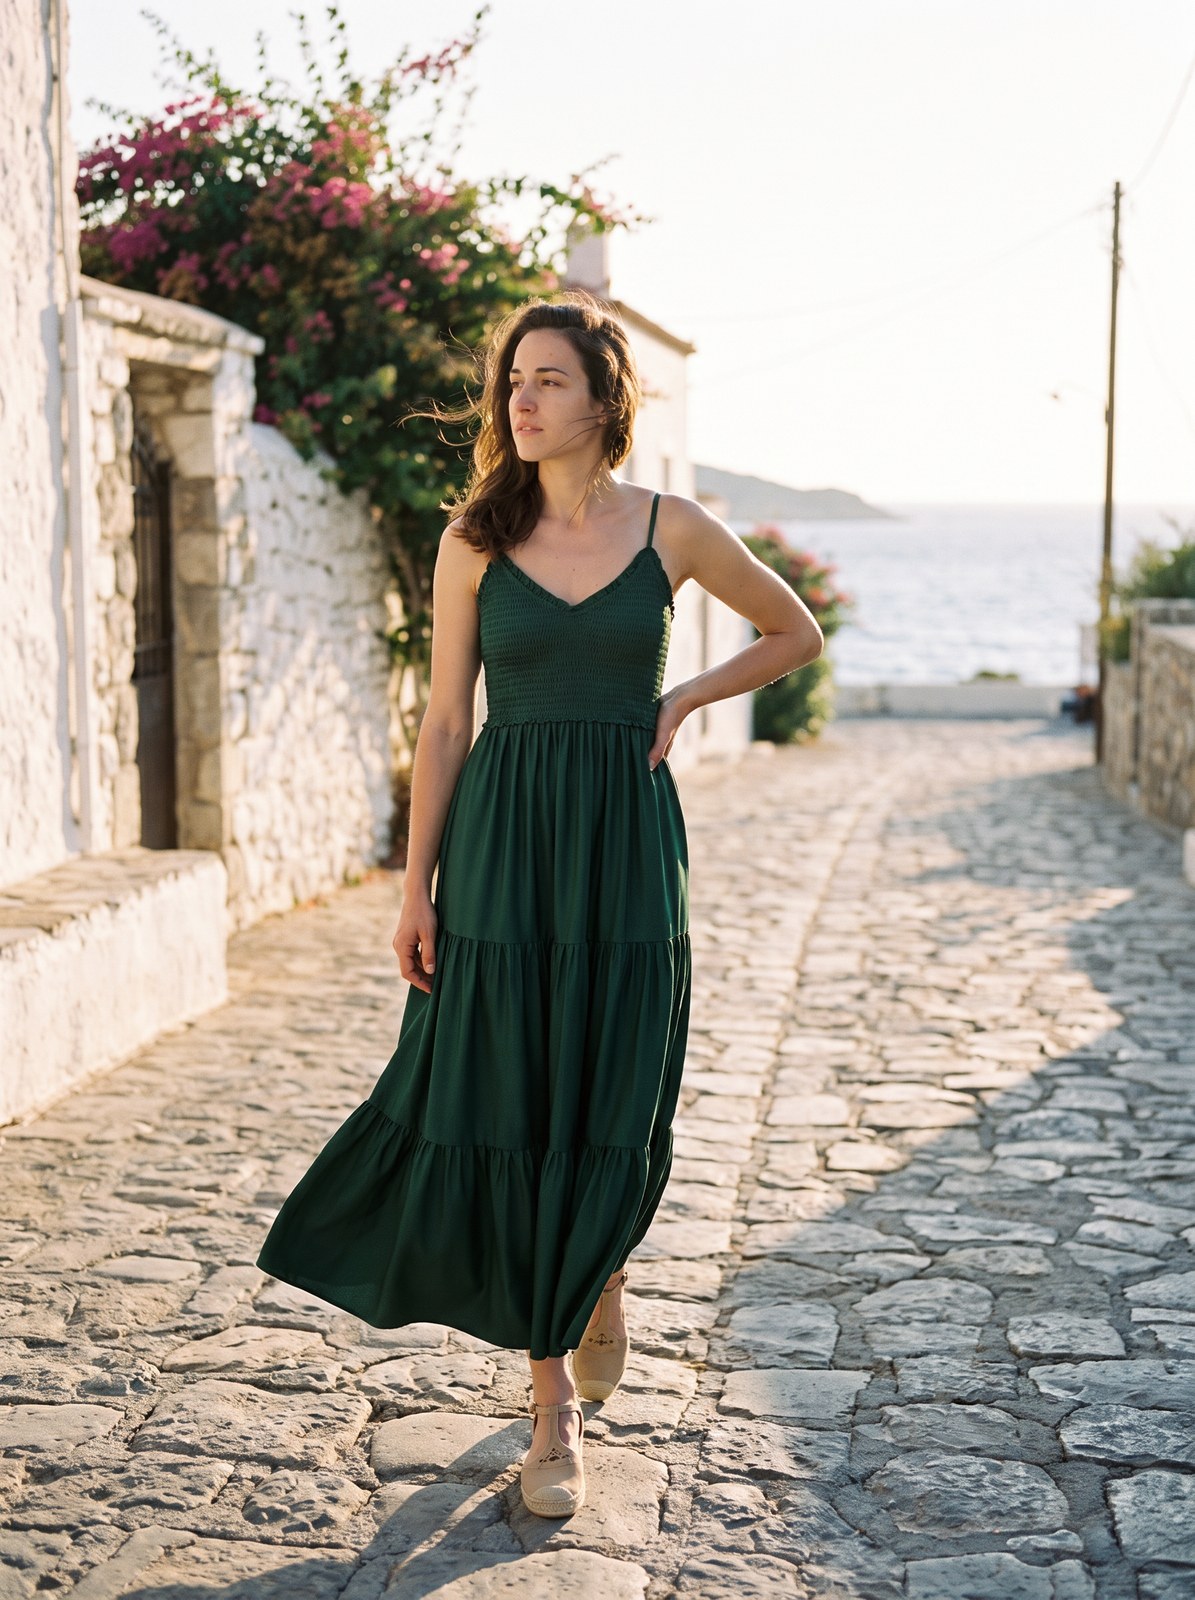
Once the workflow is familiar, Canvas automates it. A single saved workflow takes one casting image as input and generates all six character cards in one run. Save it once, and every future model goes from casting to a complete card set in a single click. Saved workflows can also be exported and shared as JSON files, so one person can set the workflow up and the whole team can use it.
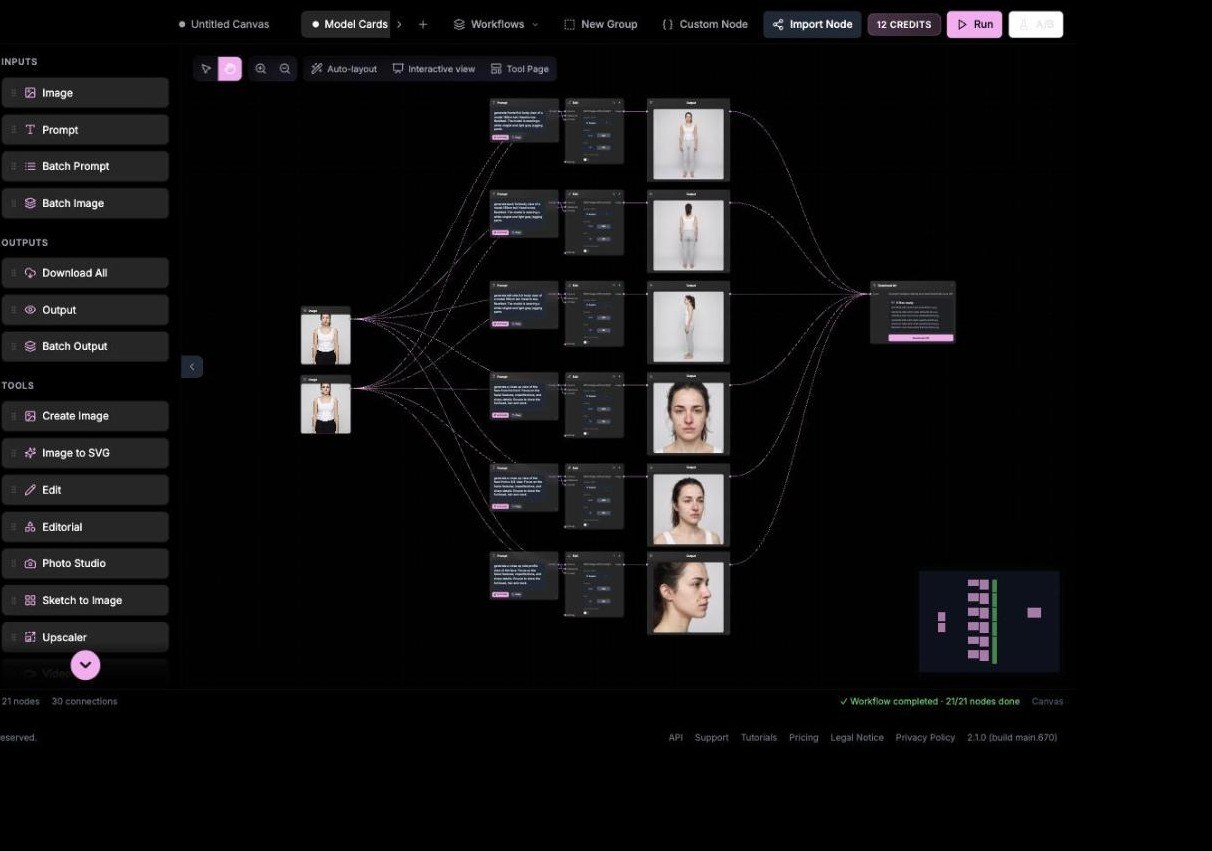
Tools such as Gemini Nano Banana Pro can generate impressive single images, and with manual effort you can feed reference images back in. The difference is the workflow. On the Intelligent Tools platform the model library, the character card pattern, the person and garment slots in Photo Studio, and saved Canvas workflows are built-in parts of the product, so consistency is a repeatable process rather than something each designer improvises per image. For a brand producing hundreds of images per collection, that difference decides whether virtual models are usable in production.
The platform is also built for ease of use by fashion teams specifically: guided tools for each step from sketch to campaign, prompt guidelines, ready-made prompt templates, and workflows shaped around fashion tasks such as packshots, colorways and e-commerce imagery, so fashion designers and brands can get production-quality results without becoming prompt engineers.
Yes, but not from a text prompt alone. You need reference images of the model in every generation. The character card workflow described above makes this repeatable: cast once, build six reference cards, and load them into each new shot.
Image models default to idealised, symmetrical faces, which viewers immediately read as artificial. Prompting specific asymmetries and skin details such as pores, freckles, moles and fine lines produces images that read as photography.
Always 2K resolution for best-quality results. The skin detail that makes the model realistic needs the resolution to survive into e-commerce and campaign crops.
Yes. Keep each model's card set in a shared Library folder, and share the Canvas workflow as a JSON export, so every team member casts and shoots from the same setup.
Cast your model in Create Image, build the card set with Edit Image, and dress her in your collection with Photo Studio. Sign up free at app.thefabricant.com and create your model once, then reuse her in every shot.